Calculation of a TileCache (Site Plan)
This example demonstrates how to compute a TileCache from an existing gView Server service. This TileCache can then be integrated via the WMTS interface into various applications. Preprocessing the tiles improves the service’s performance and reduces server load.
Ultimately, a TileCache consists only of individual (tile) images. These can also be combined into Compact TileCache tiles, reducing the number of individual images held (easier to copy, less storage space).
A gView TileCache offers various styles. For example, the tiles can be displayed in black and white using filters on-the-fly.
MapService Metadata
To use a service as a TileCache, the first step is to adjust the service’s metadata. To do this, one must
log in via the gView.Server web interface with Manage (Sidebar) as an Administrator.
Access the service’s properties to reach its metadata:

In the metadata dialog, first switch to the Tile Service Properties area:
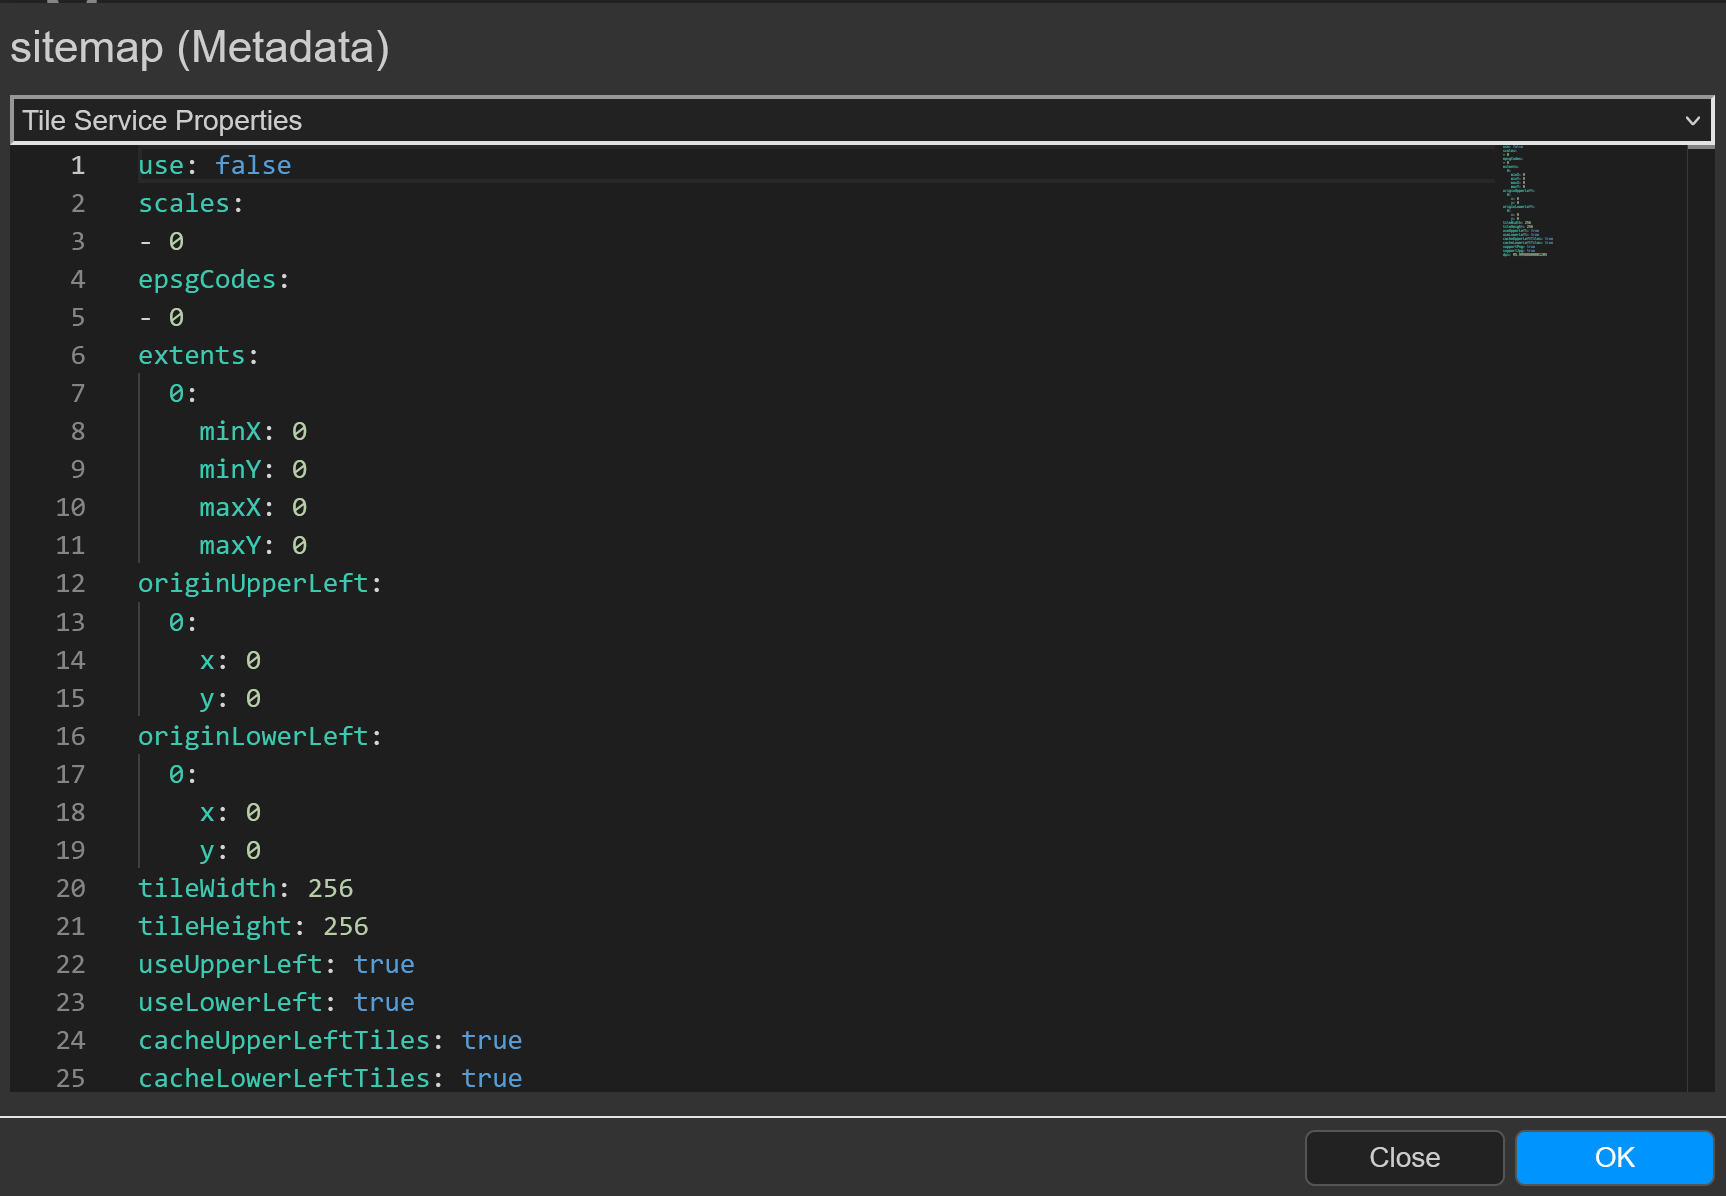
Here, the properties of the TileCache can be defined in a YAML file. The changes for the service might look something like this:
use: true
scales:
- 1000000
- 500000
- 250000
- 100000
- 50000
- 25000
- 10000
- 5000
- 2500
- 1000
- 500
epsgCodes:
- 31256
extents:
31256:
    minX: -226900
    minY: 163300
    maxX: 0
    maxY: 315500
originUpperLeft:
31256:
    x: -5622500
    y: 5001000
originLowerLeft:
31256:
    x: -226900
    y: 163300
tileWidth: 512
tileHeight: 512
useUpperLeft: true
useLowerLeft: false
cacheUpperLeftTiles: true
cacheLowerLeftTiles: false
supportPng: true
supportJpg: false
dpi: 95.9998080000121
Note
It is important that use is set to true to ensure that the service later offers the TileCache
interfaces.
When you navigate via the Sidebar/Browse to the service and click on it, WMTS should be
offered as an interface:

The Capabilities should also yield a result (click on the link):
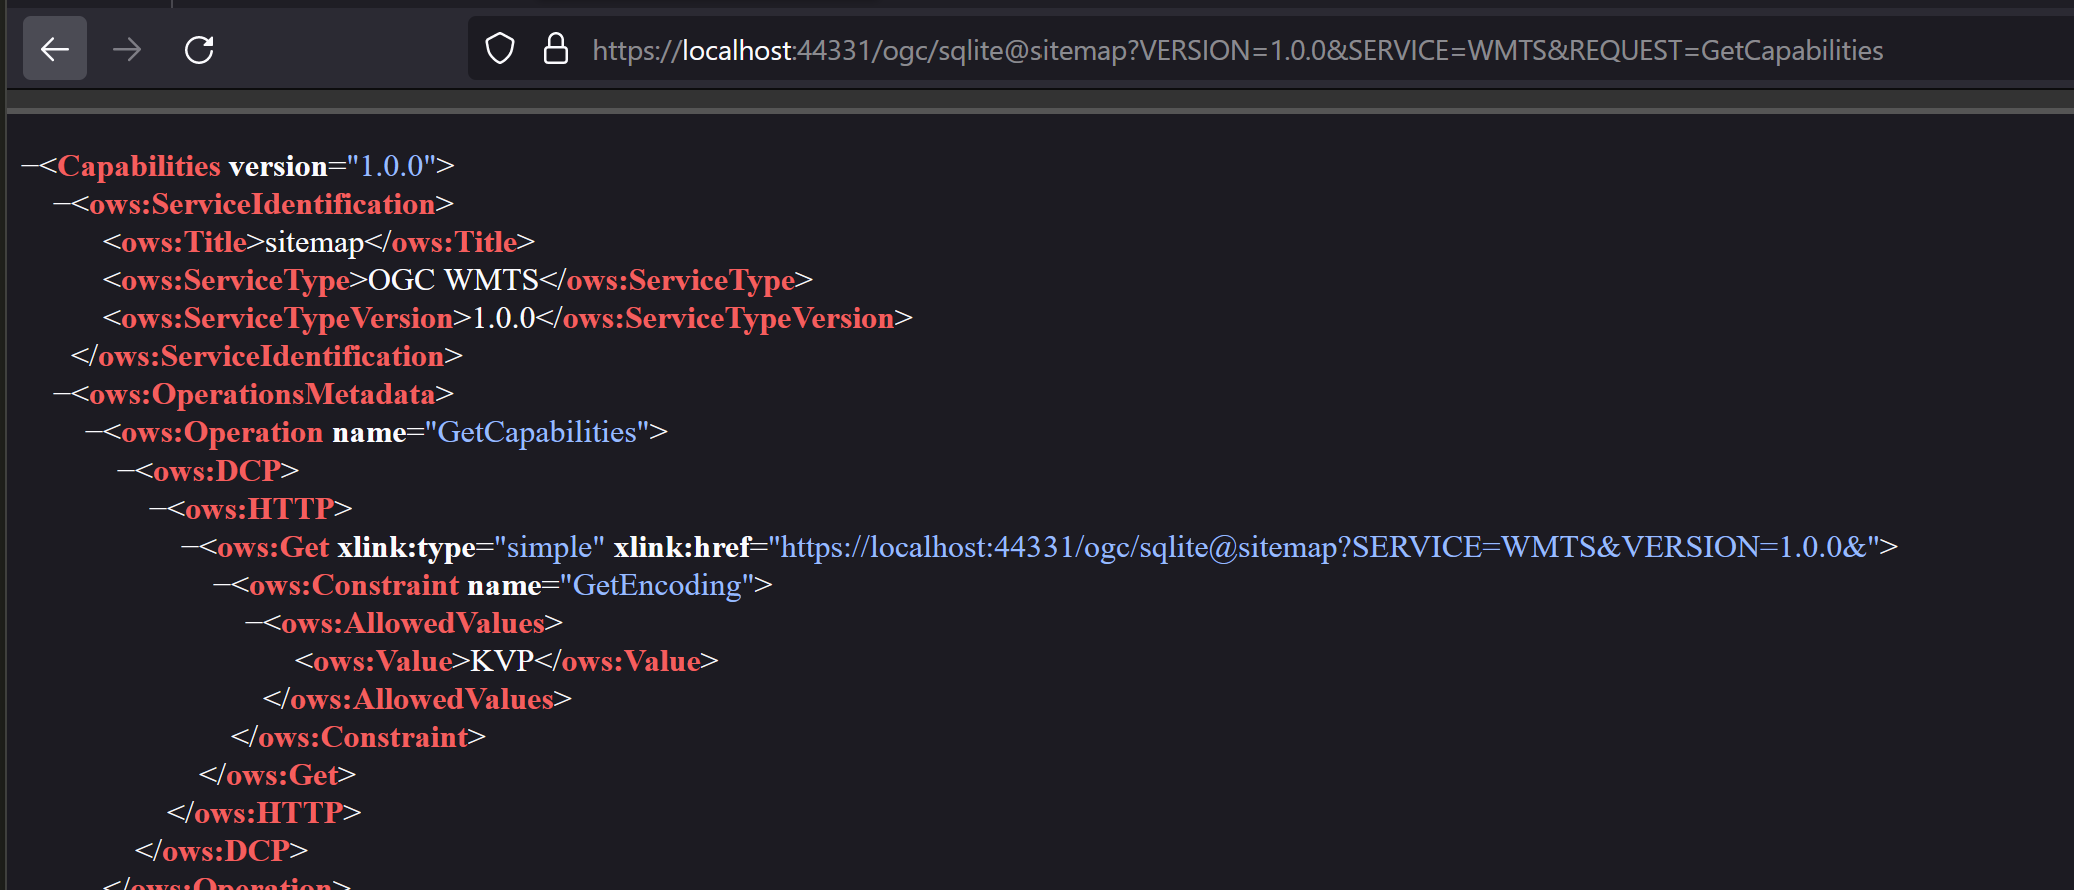
Note
While the WMTS Capabilities are displayed, they do so without individual scale levels. The reason is that no tiles have been computed yet.
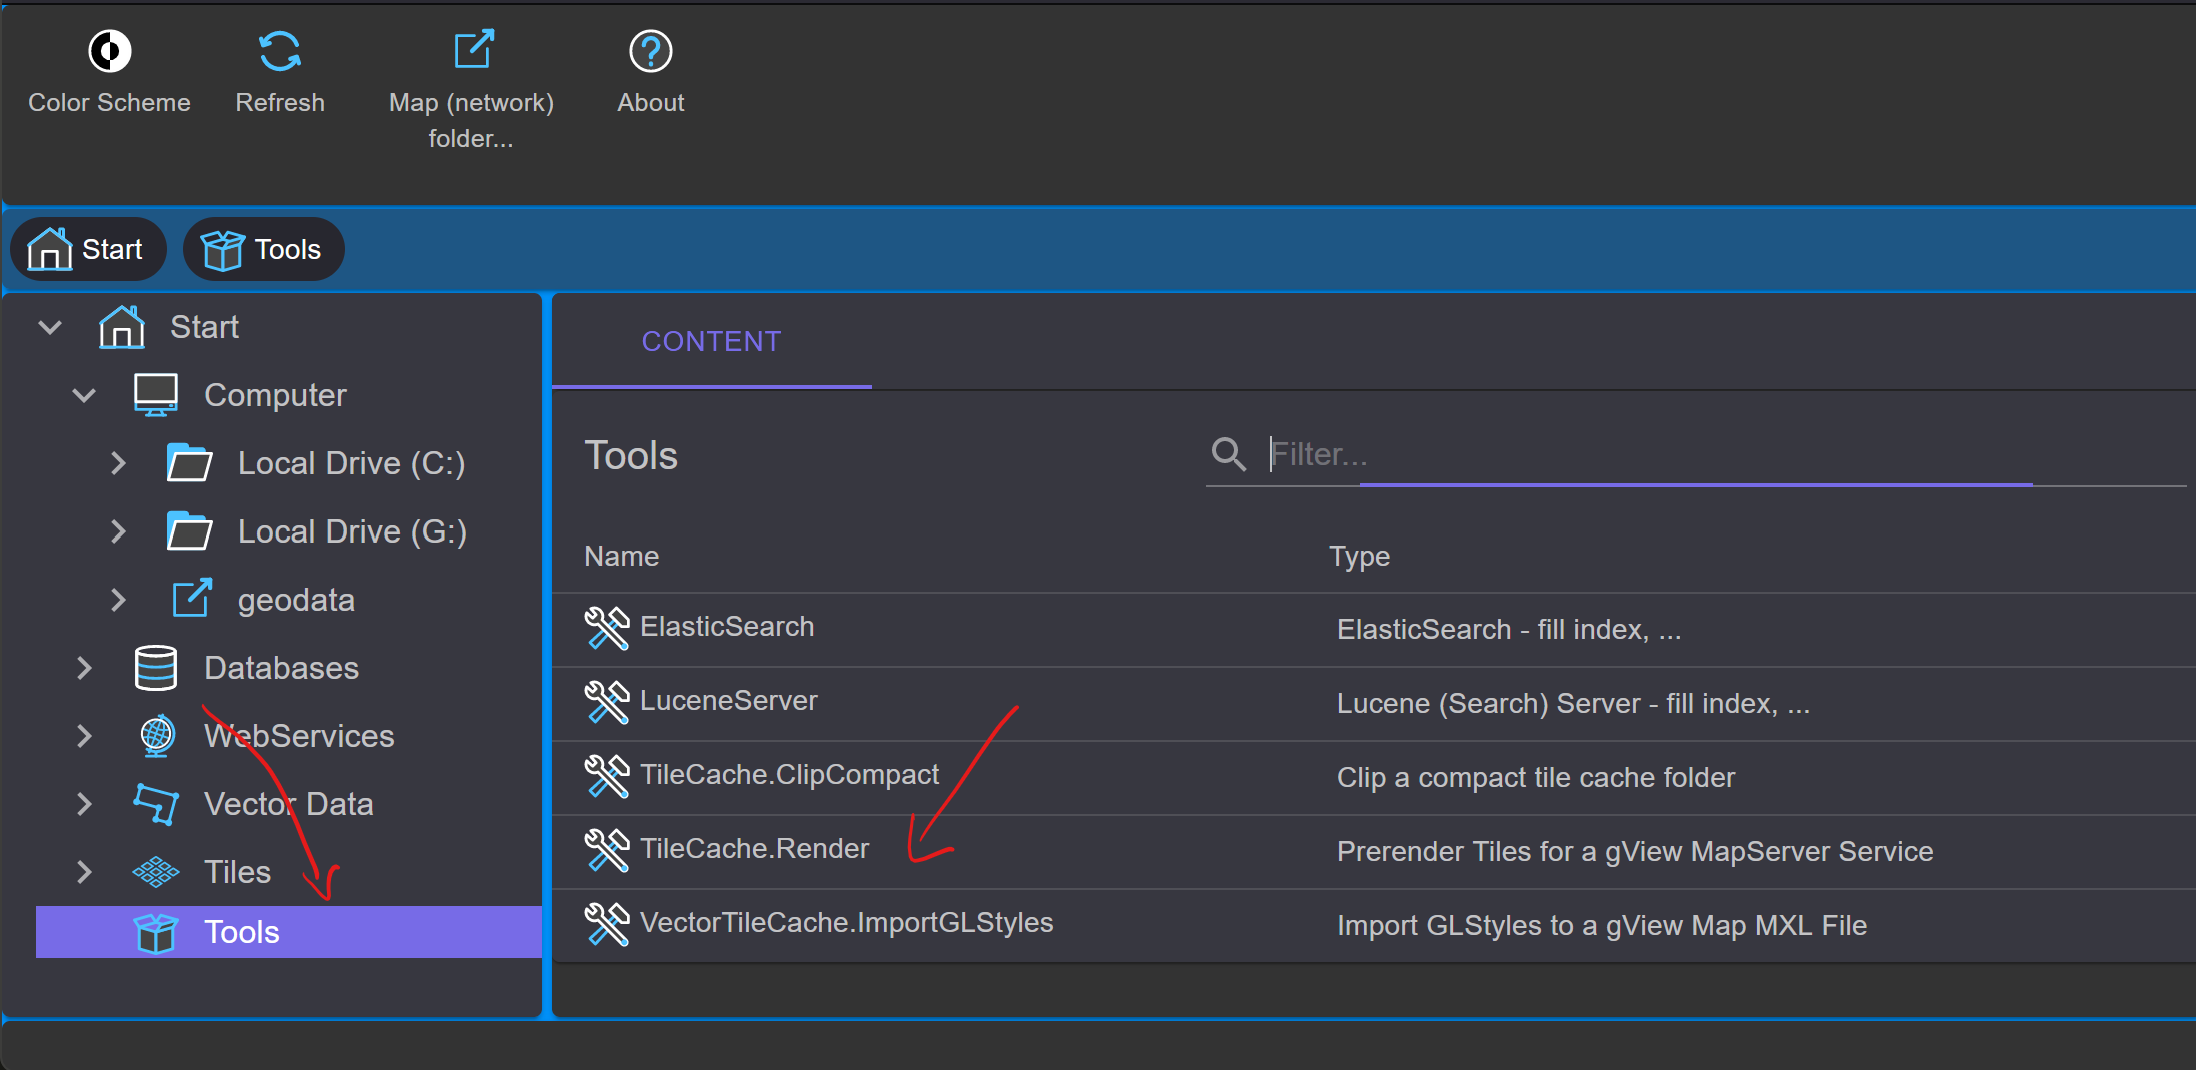
Computing Tiles
To compute the tiles, switch to the gView.DataExplorer app. There, under Tools, there is
a tool for computing tiles (TileCache.Render):
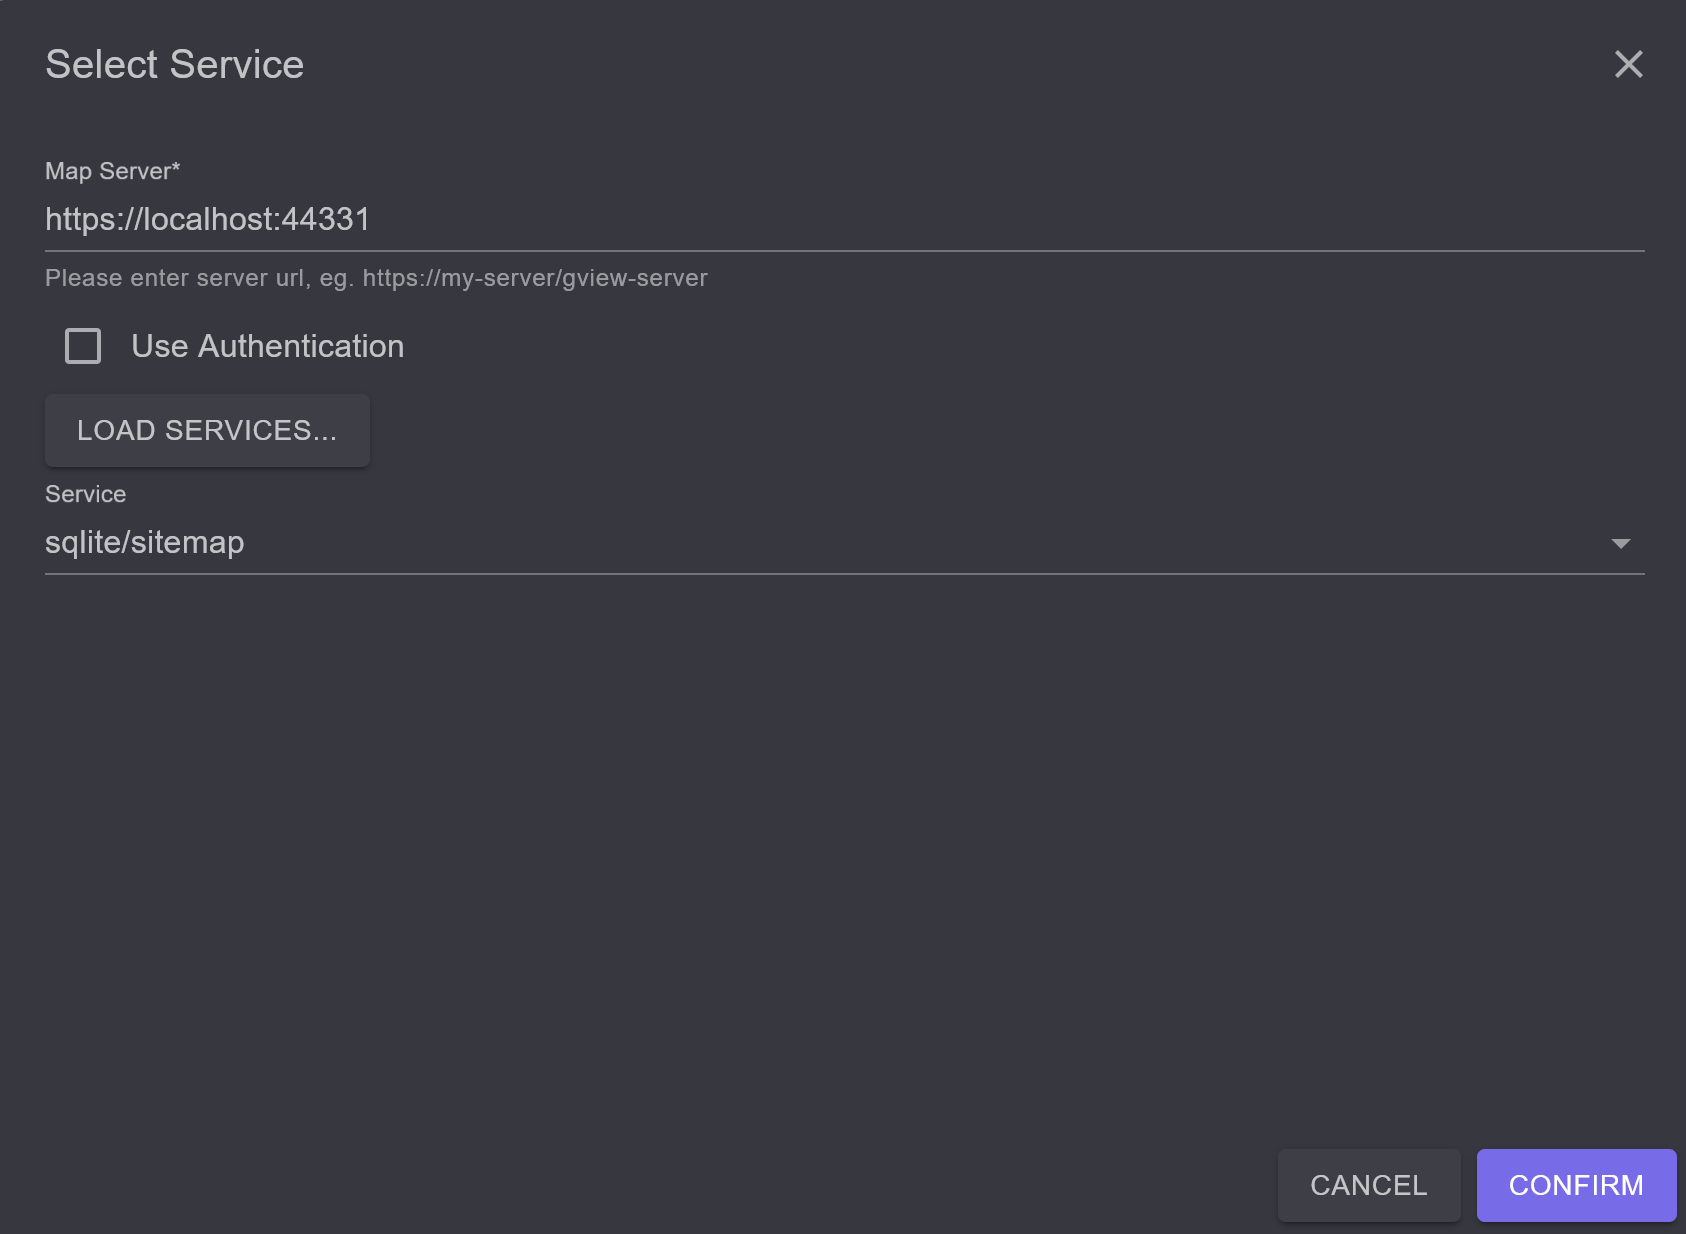
When starting the tool, the URL to the server must first be specified. If the service is protected,
a Client and a Secret may also need to be specified.
Select the appropriate service from the list and confirm the dialog with Ok:
If the service is recognized as a WMTS service, a dialog appears with the TileCache options for the service. Here, settings can be adjusted for how the TileCache should be computed.
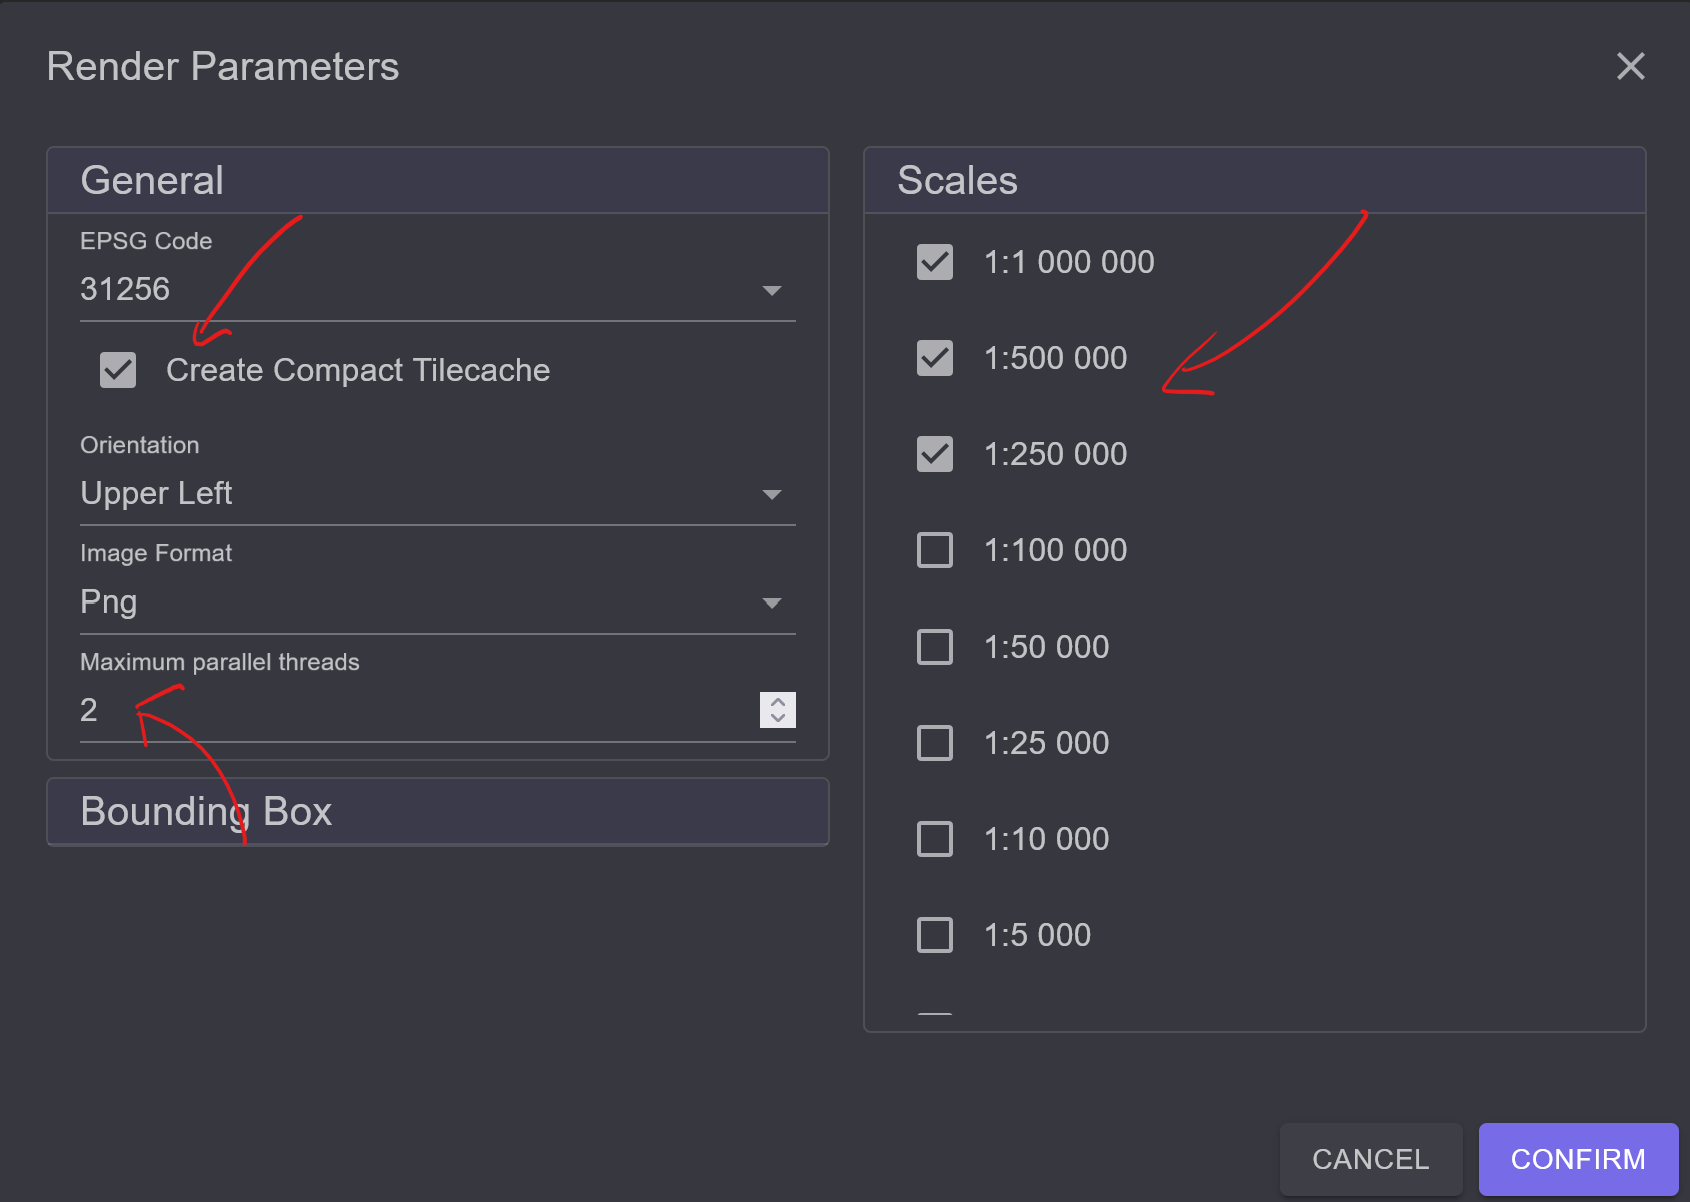
It is recommended to compute a
Compact Tile Cache because it generates fewer files. TileCaches, which consist of individual tile
images, require a lot of storage space and are difficult to copy.
To speed up the computation, the number of parallel Threads can be specified. The computation is fundamentally carried out on the gView.Server. The number specified here controls how many Render commands are sent to the server simultaneously.
The Scales list can be used to control which scales should be rendered.
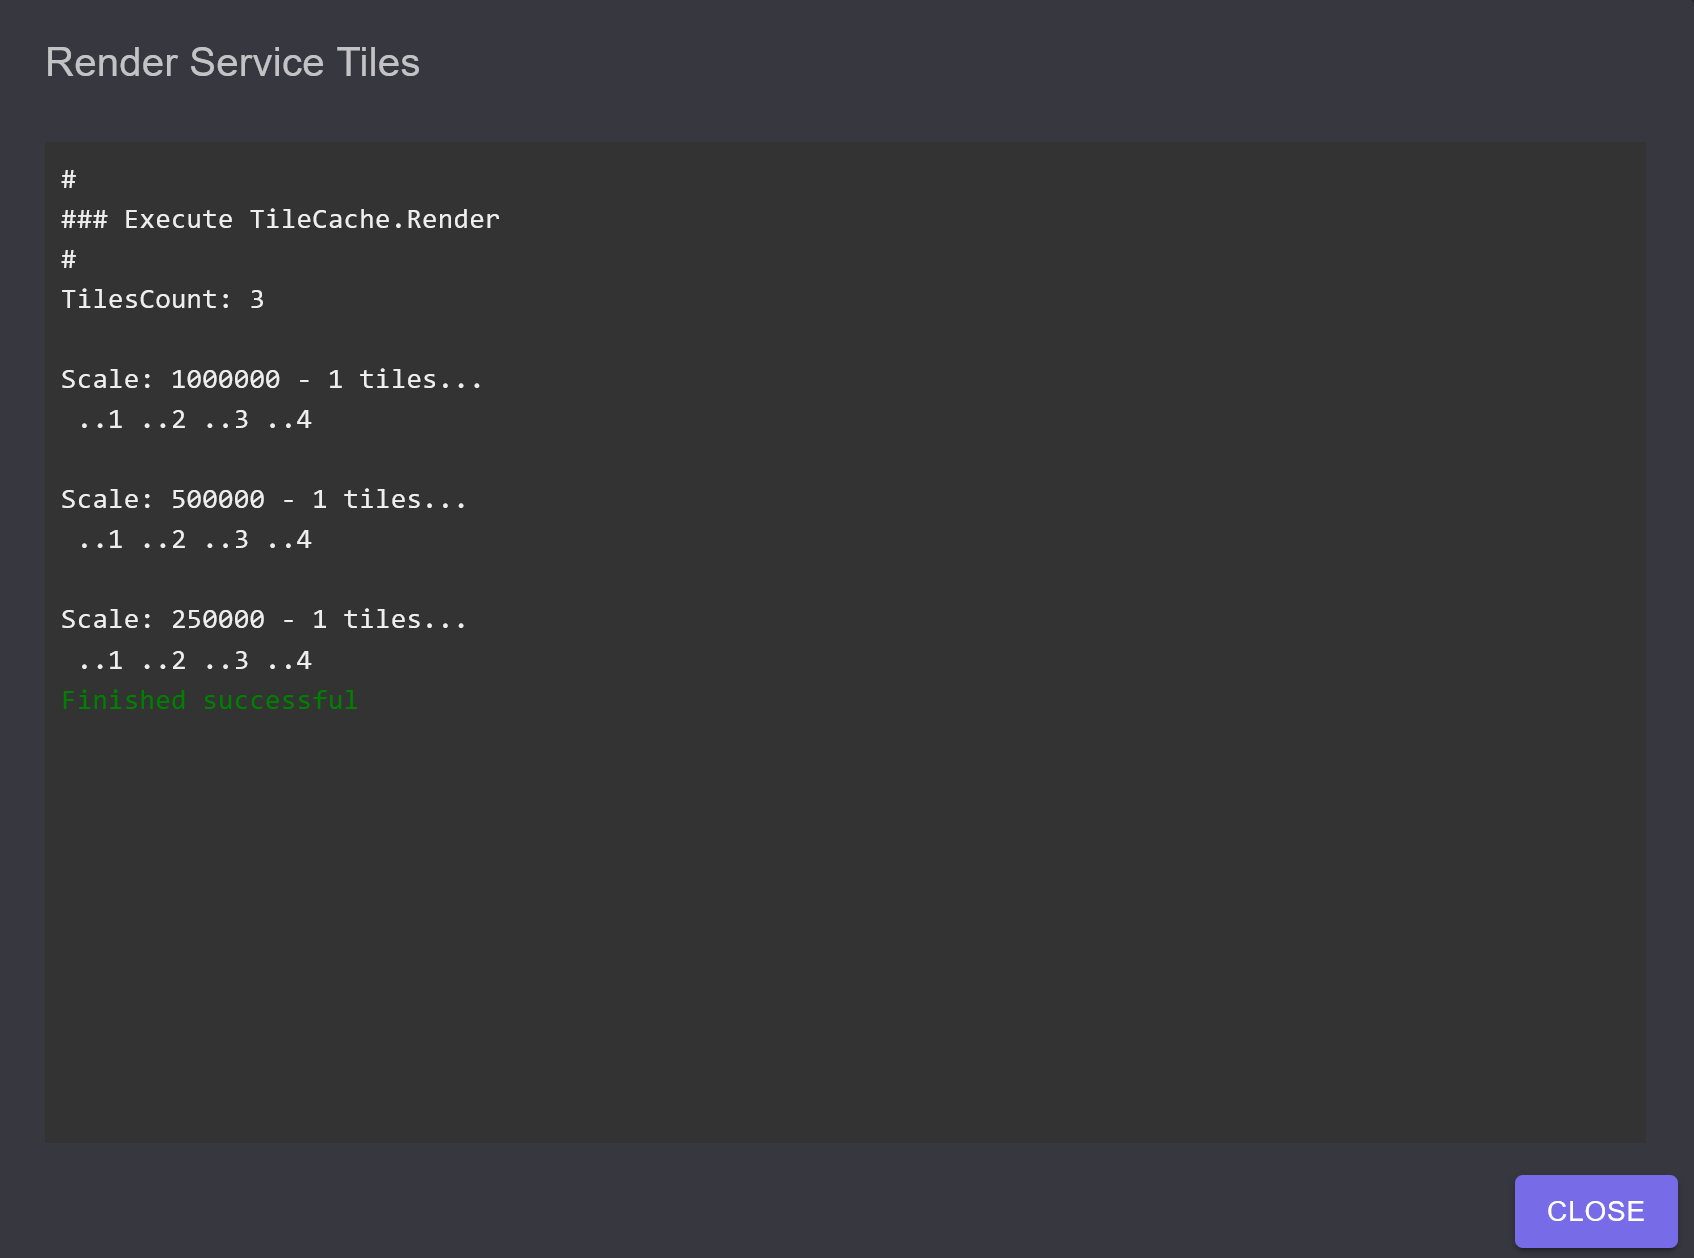
Confirming the dialog with Confirm will display a command line that can be executed with Start.
The output looks something like this:
Note
Execution via the gView.DataExplorer can also be done using the command line tool, see gView Command Line Tools (gView.Cmd RenderTile). Since TileCaches take a long time to compute, it is recommended to use the command line for production purposes. Otherwise, it must be ensured that the gView.DataExplorer remains open throughout the entire computation.
However, the method described here can be used to obtain the transfer parameters for the command line tool via a graphical interface. When the window with the command line call pops up, it can simply be copied and executed on the server.
Switching back to the gView.Server and to the service’s WMTS Capabilities after the computation, the computed scale levels should now also be displayed.
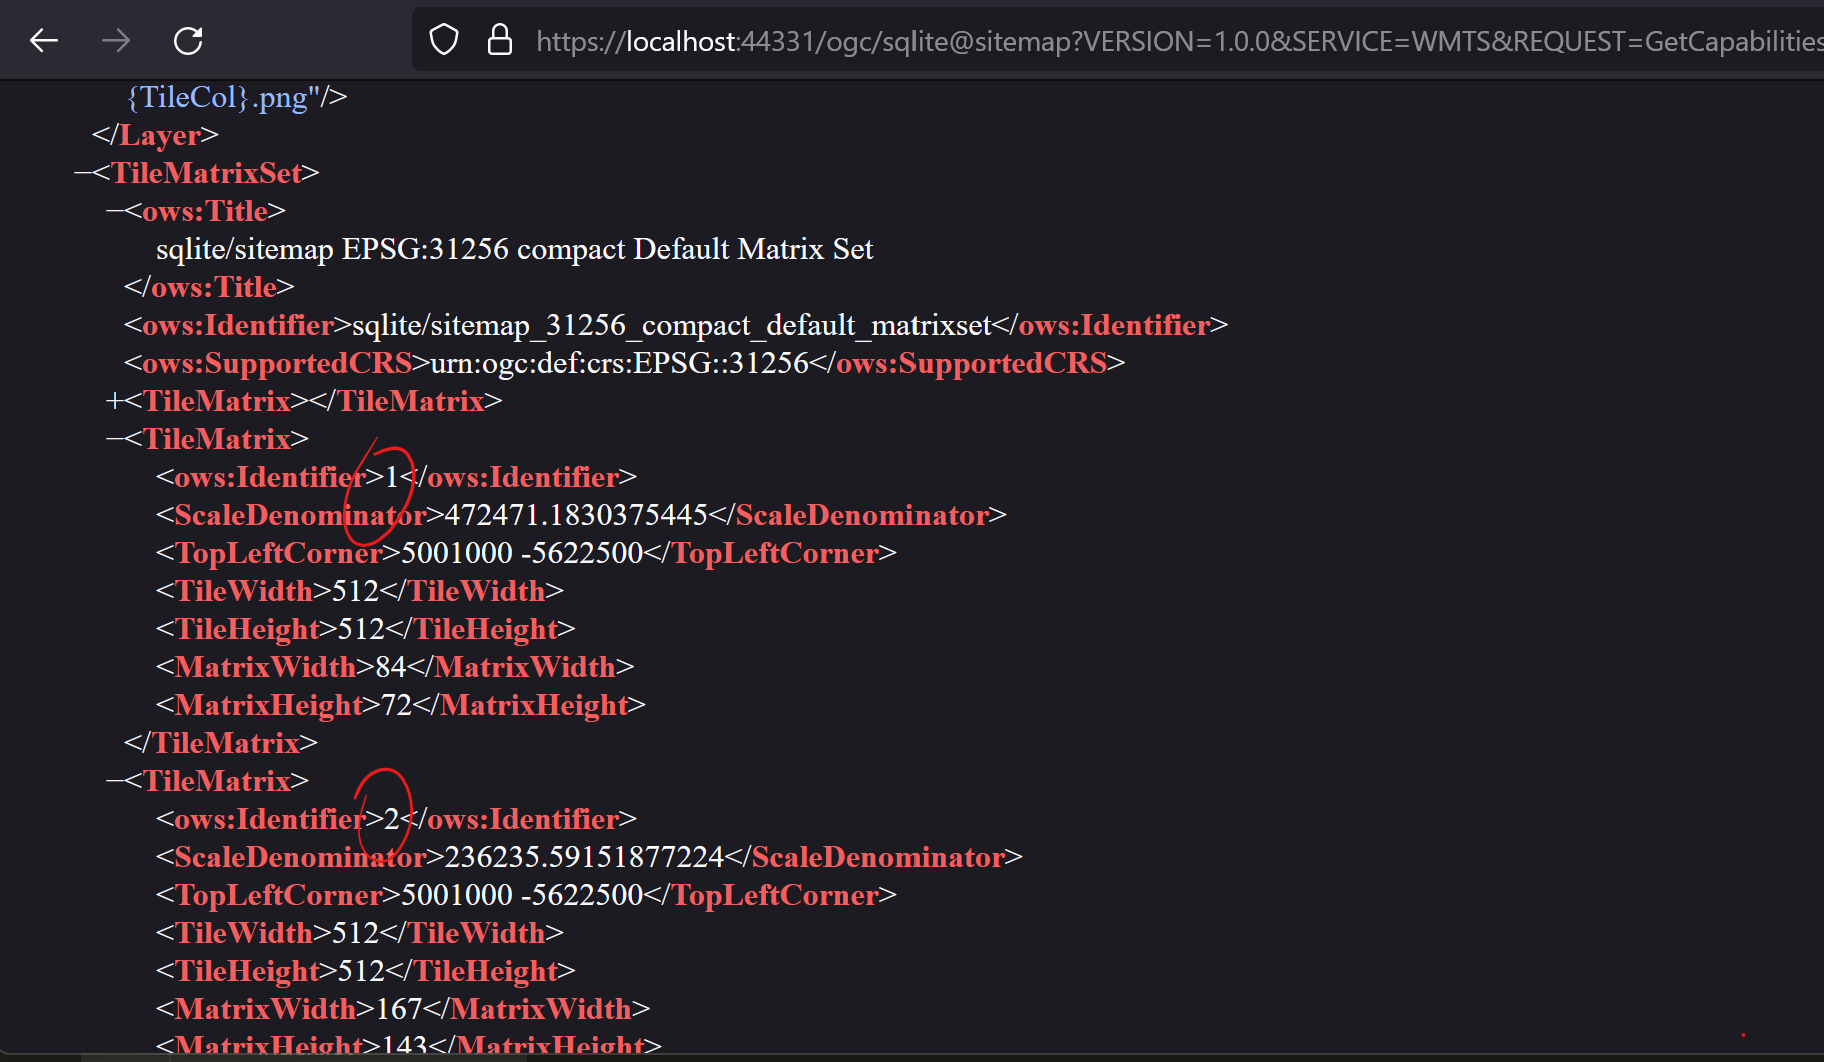
Note
Only the scale levels for which a directory has been created in the TileCache directory on the server
(see file _config/mapserver.json) for the respective service are displayed:
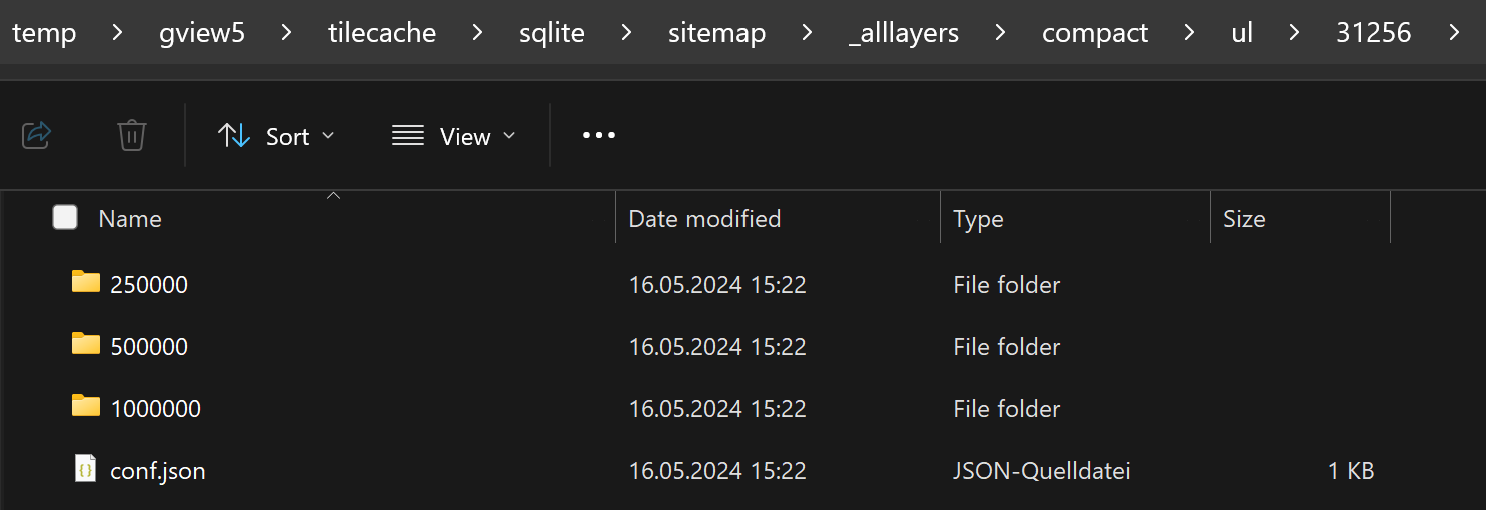
If you want certain scale levels to be computed on the fly, this can be achieved by manually
creating the respective directory (scale number). If the gView.Server later finds no tiles in
the directory,
the tiles will always be created and delivered on the fly.
Caution: This should only be done with performant services. And only if the computation of the corresponding scale level is not feasible.