Creating a Raster (Catalog) Dataset
This section describes how to create a raster catalog dataset in a gView Feature Database. It consists of datasets with only one feature class, where the geometry of the features corresponds to the extents of the individual images. In the attribute data of the feature class, references to the image files are stored.
To create it, proceed as with normal datasets. By clicking on the New/Sql Feature Database Dataset
button in the context area of the toolbar, the following dialog appears:

Assign a descriptive name to the dataset, for example, orthophotos.
In the Spatial Reference tab, assign the spatial reference system in which the data resides,
as described in the previous chapter.
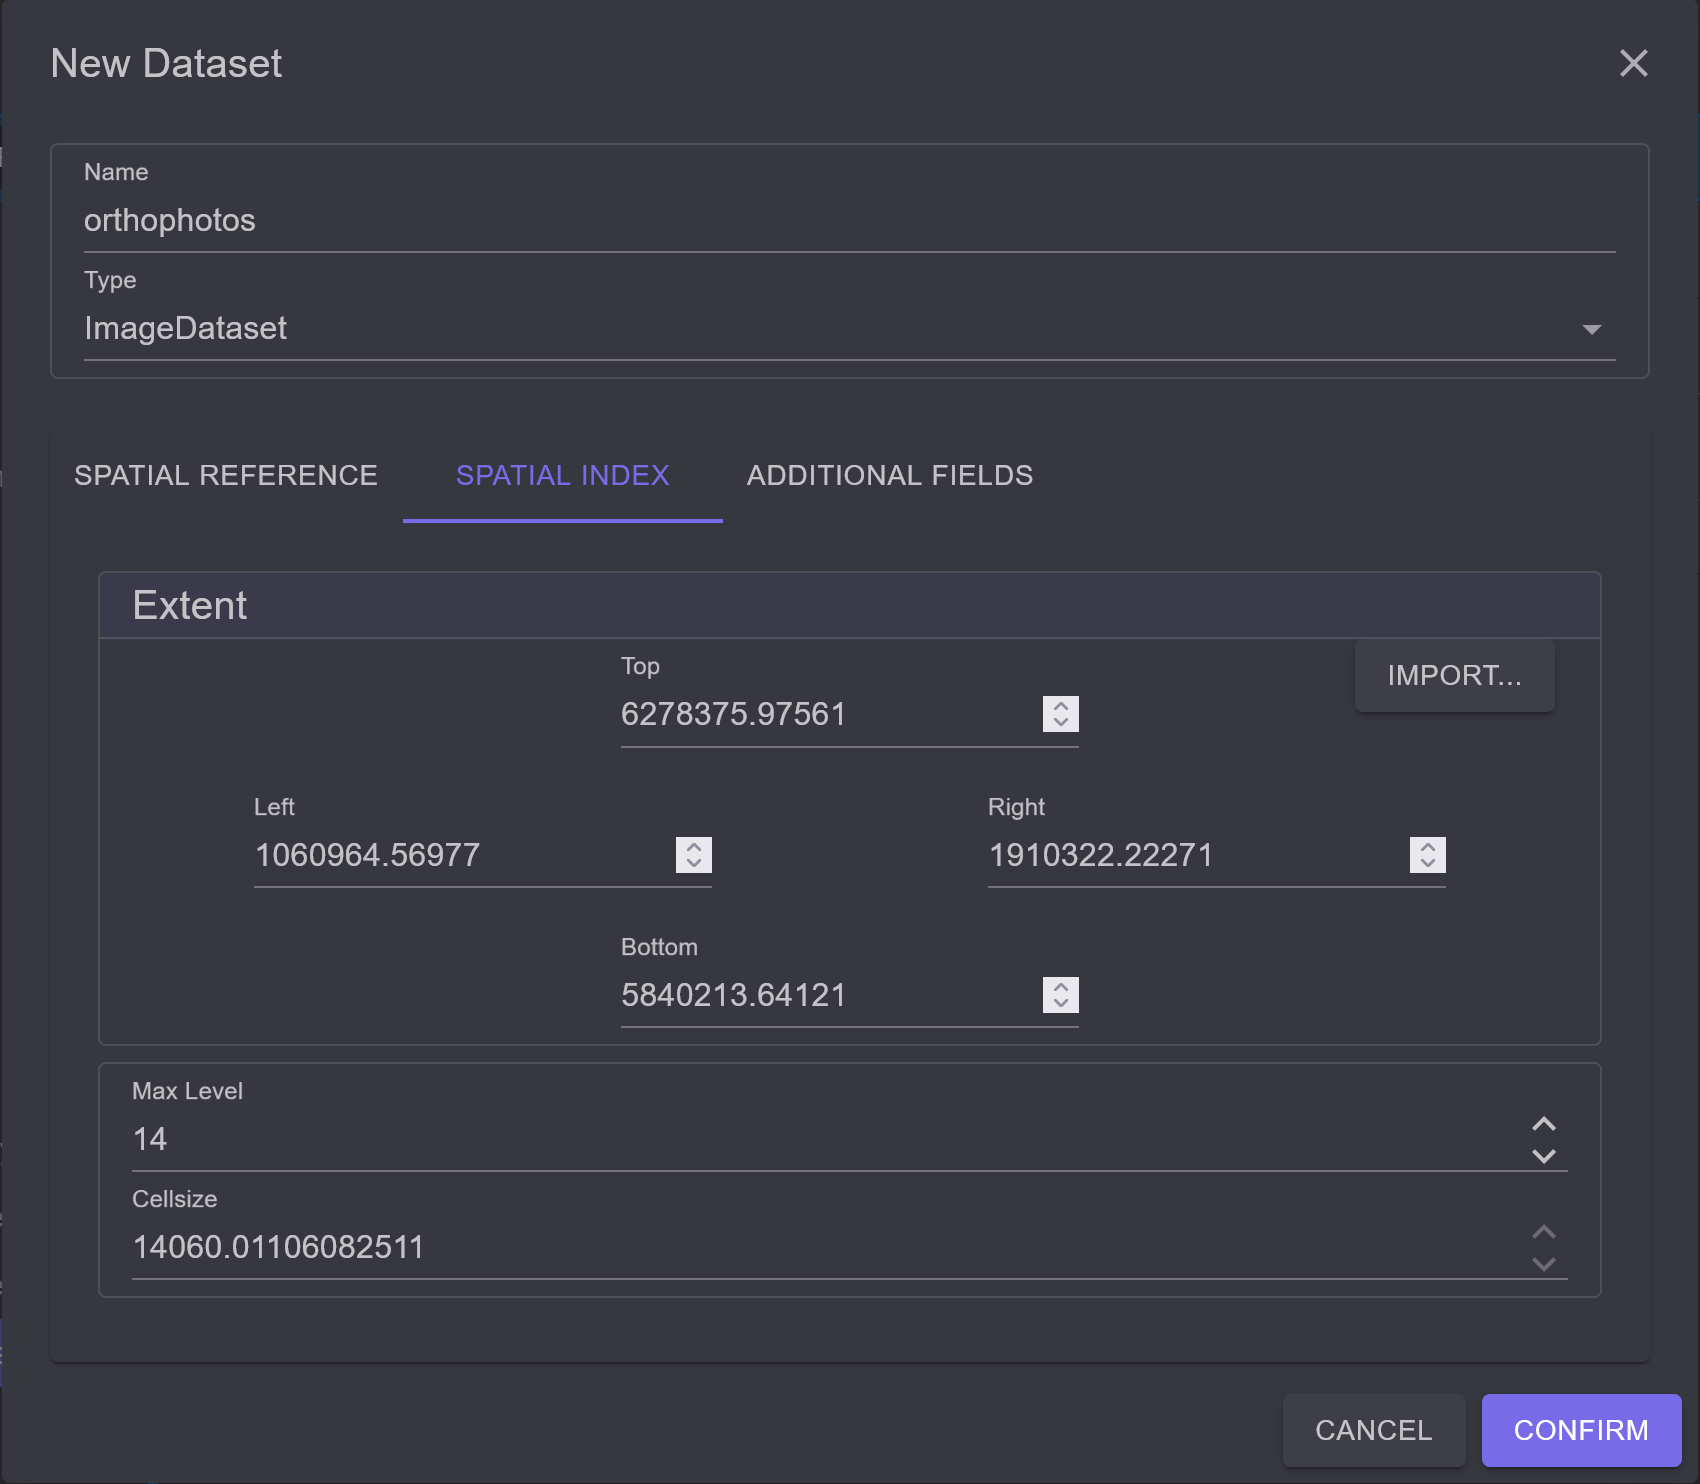
Unlike normal datasets, the tabs Spatial Index and Additional Fields have been added.
In a Feature Database, a spatial index is created for each feature class. This index is
responsible for fast access during spatial queries. When copying data, the spatial index is
automatically created. This step was omitted in the method of data import described above. However,
for raster catalogs, the spatial extent of this index must be specified when creating the dataset.
The rectangular extent should be chosen so that all georeferenced images fit within it.
It is also possible to include images that do not lie within the index extent, but these
images will not be indexed. Therefore, provide a generous extent. To simplify the process,
there is an option to import the extent from an existing feature class (button Import...).
The indexing of individual features occurs hierarchically in a tree structure.
The depth of the index tree is set in the Max Levels area. The value here should
be increased until the cell size is approximately two to three times the geographic diagonal of a
georeferenced image. Once all values are entered, the dialog looks something like this:
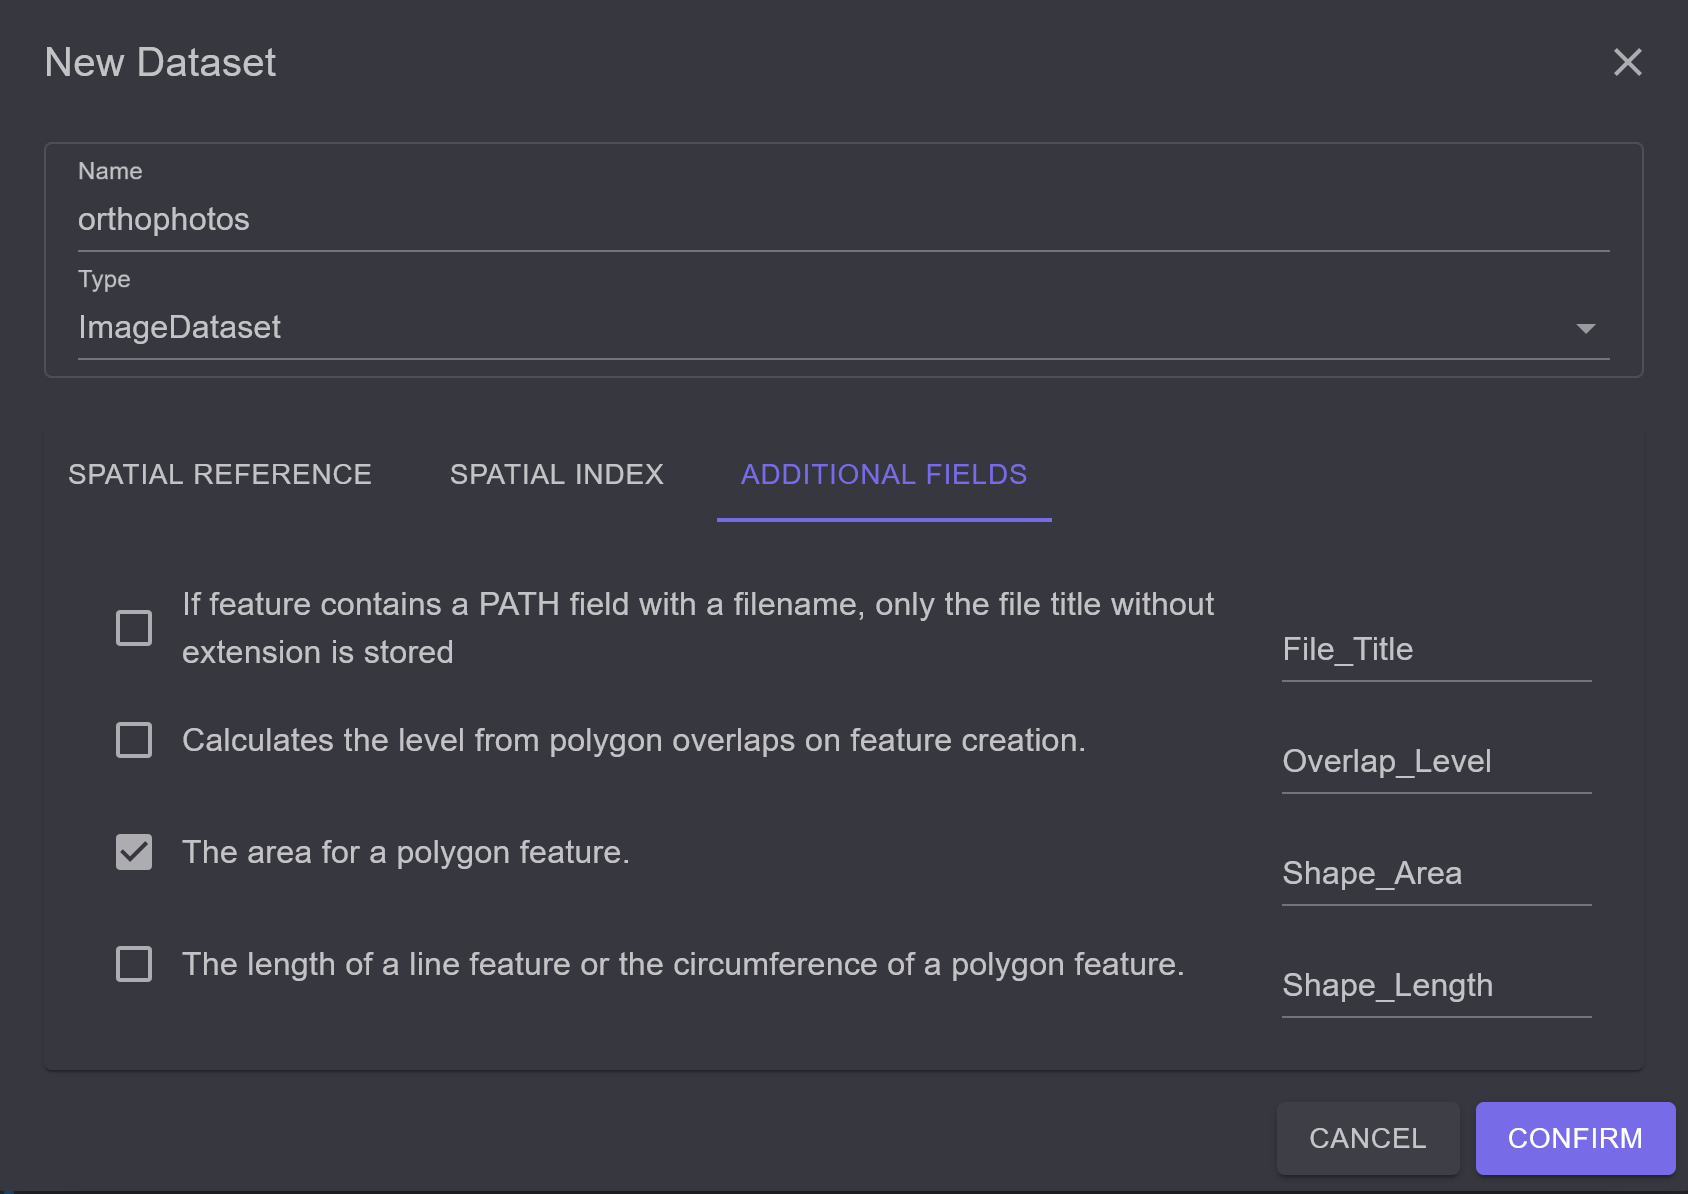
Under Additional Fields, fields can be added to the image feature class, which are automatically
calculated by the database for each image polygon. All these fields are optional. For example,
choose Shape Area if you want to save the area for each polygon:
Upon confirming the dialog with OK, the Script window appears to generate the dataset.
If the script is successfully executed, the new dataset appears in the Content area. The icon
slightly differs from a normal dataset icon to indicate that it is a raster catalog dataset:
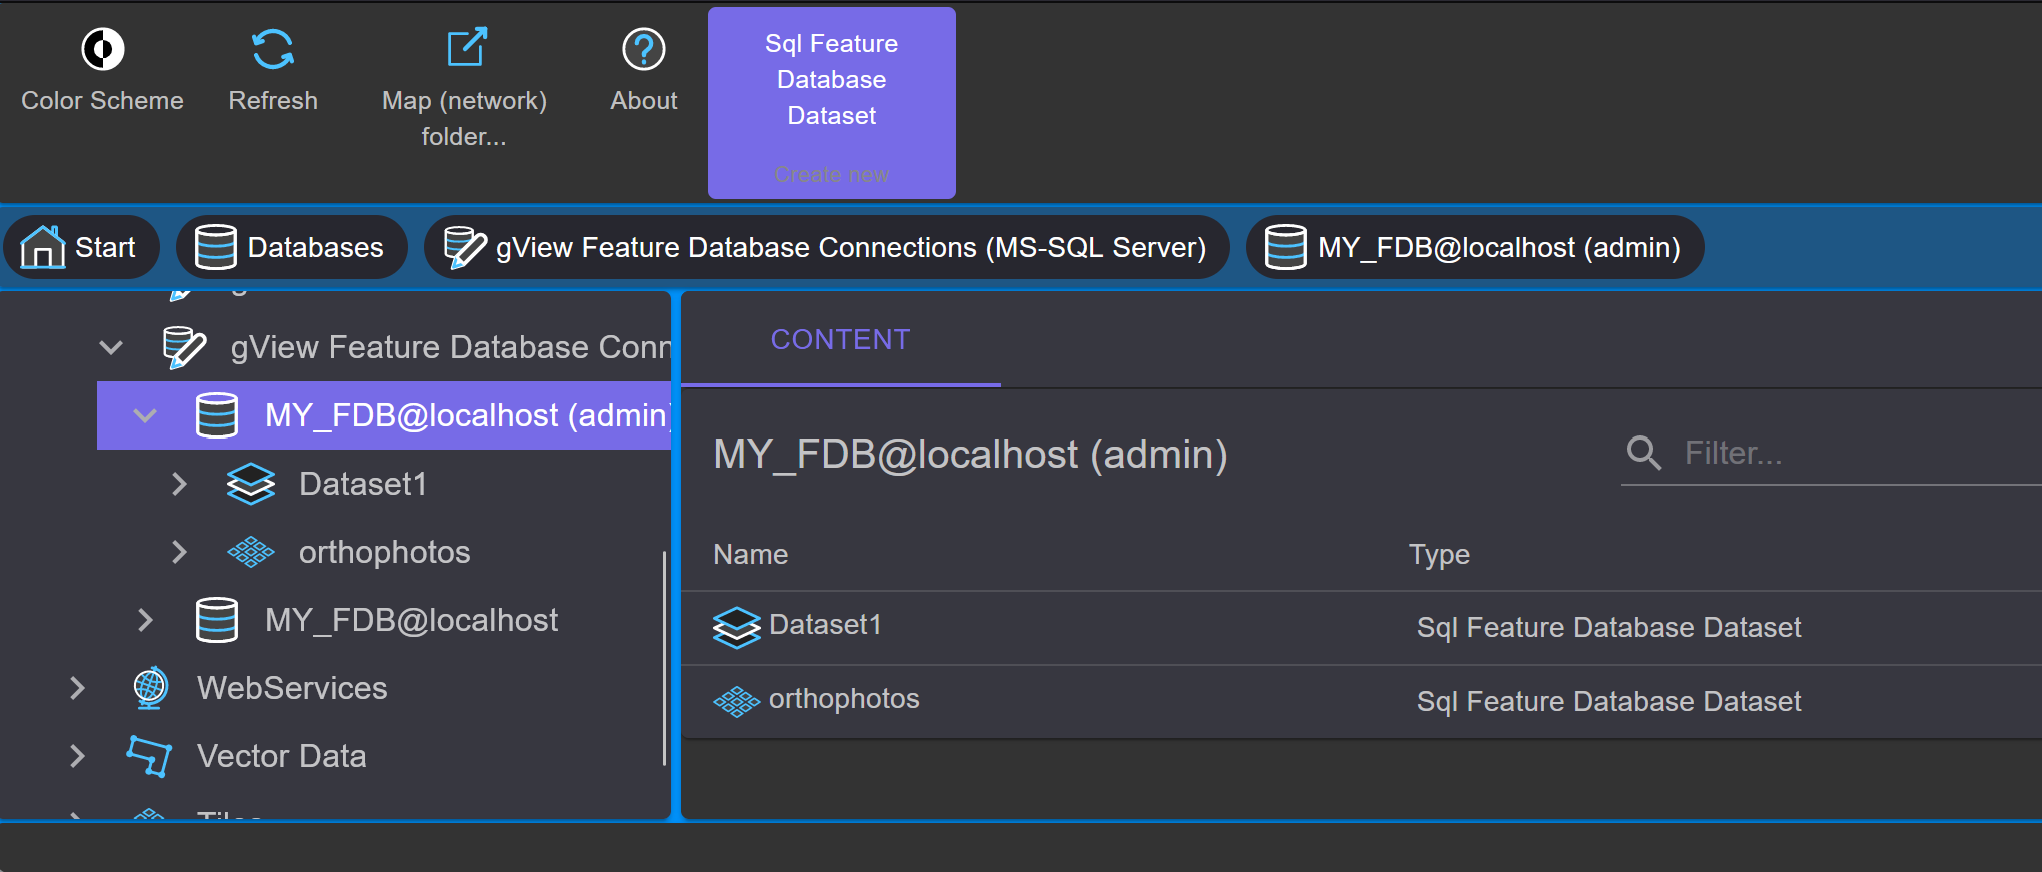
Double-clicking on the icon opens the contents of this dataset:
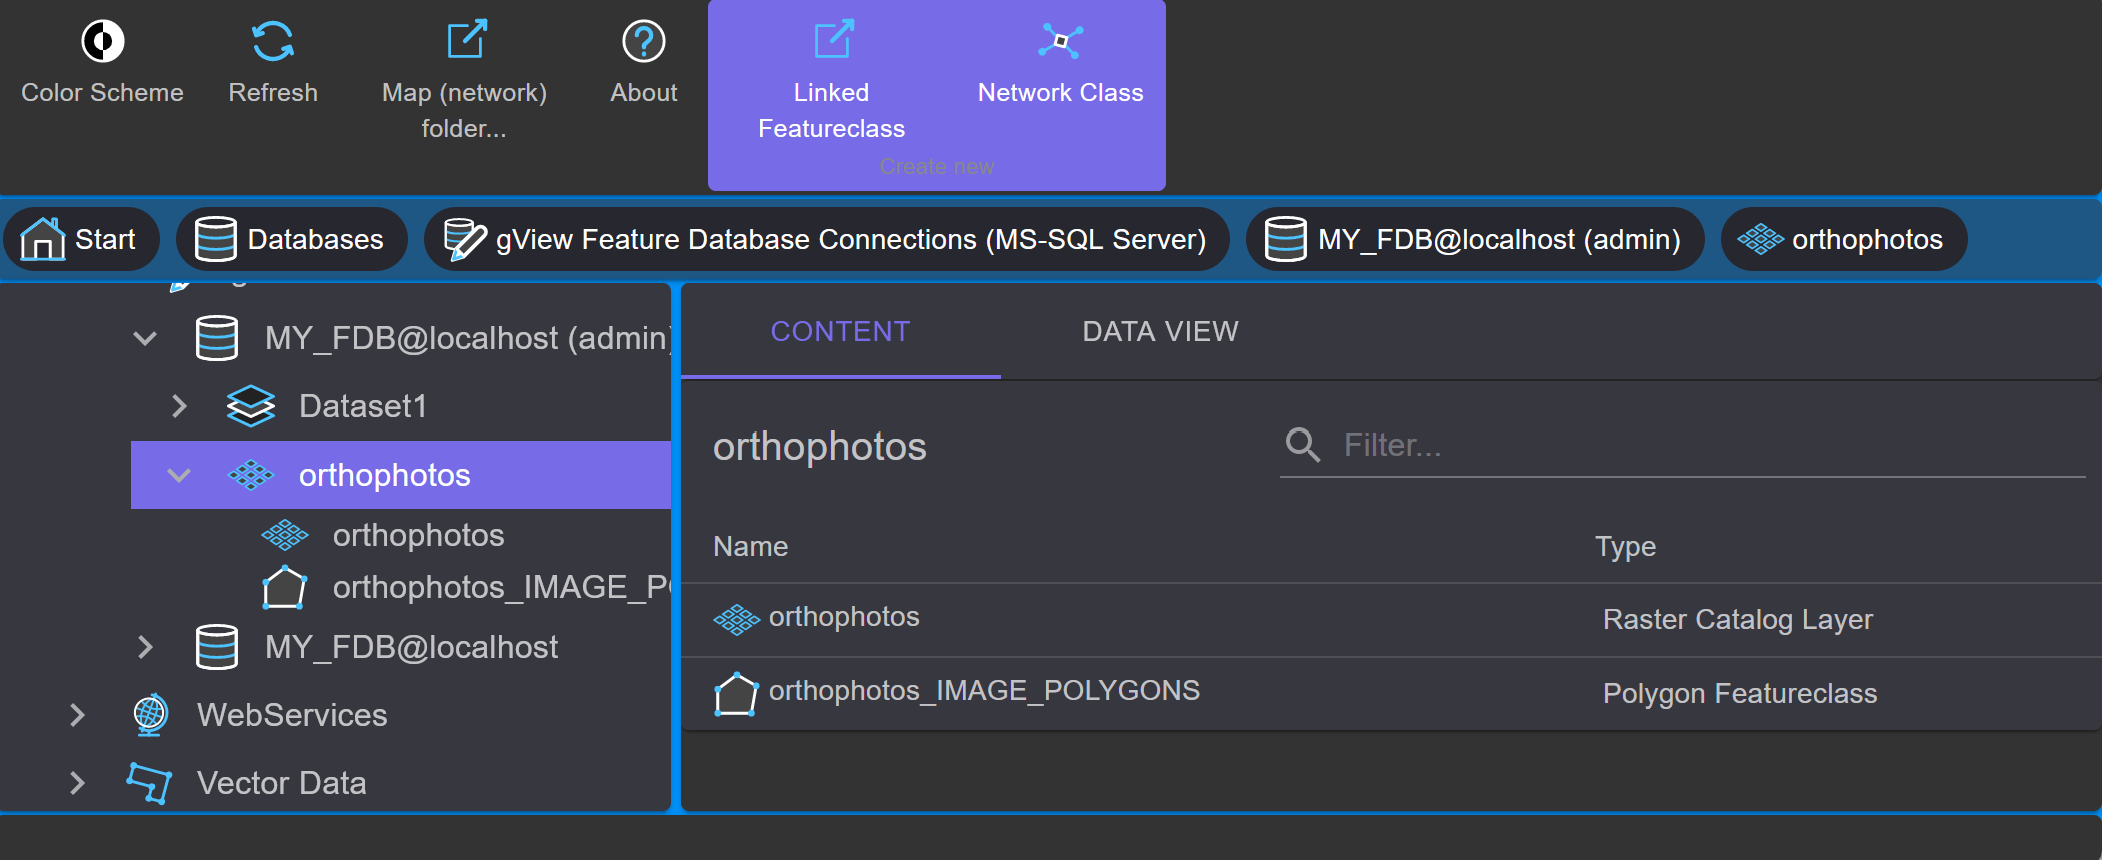
As described above, the image polygons are created in a feature class. The name of
the feature class is always the same as the name of the dataset appended with _IMAGE_POLYGONS.
This name must not be changed! The first icon with the name orthophotos (always the same as
the dataset) is used to input the images. After opening by double-clicking, the following
view appears:
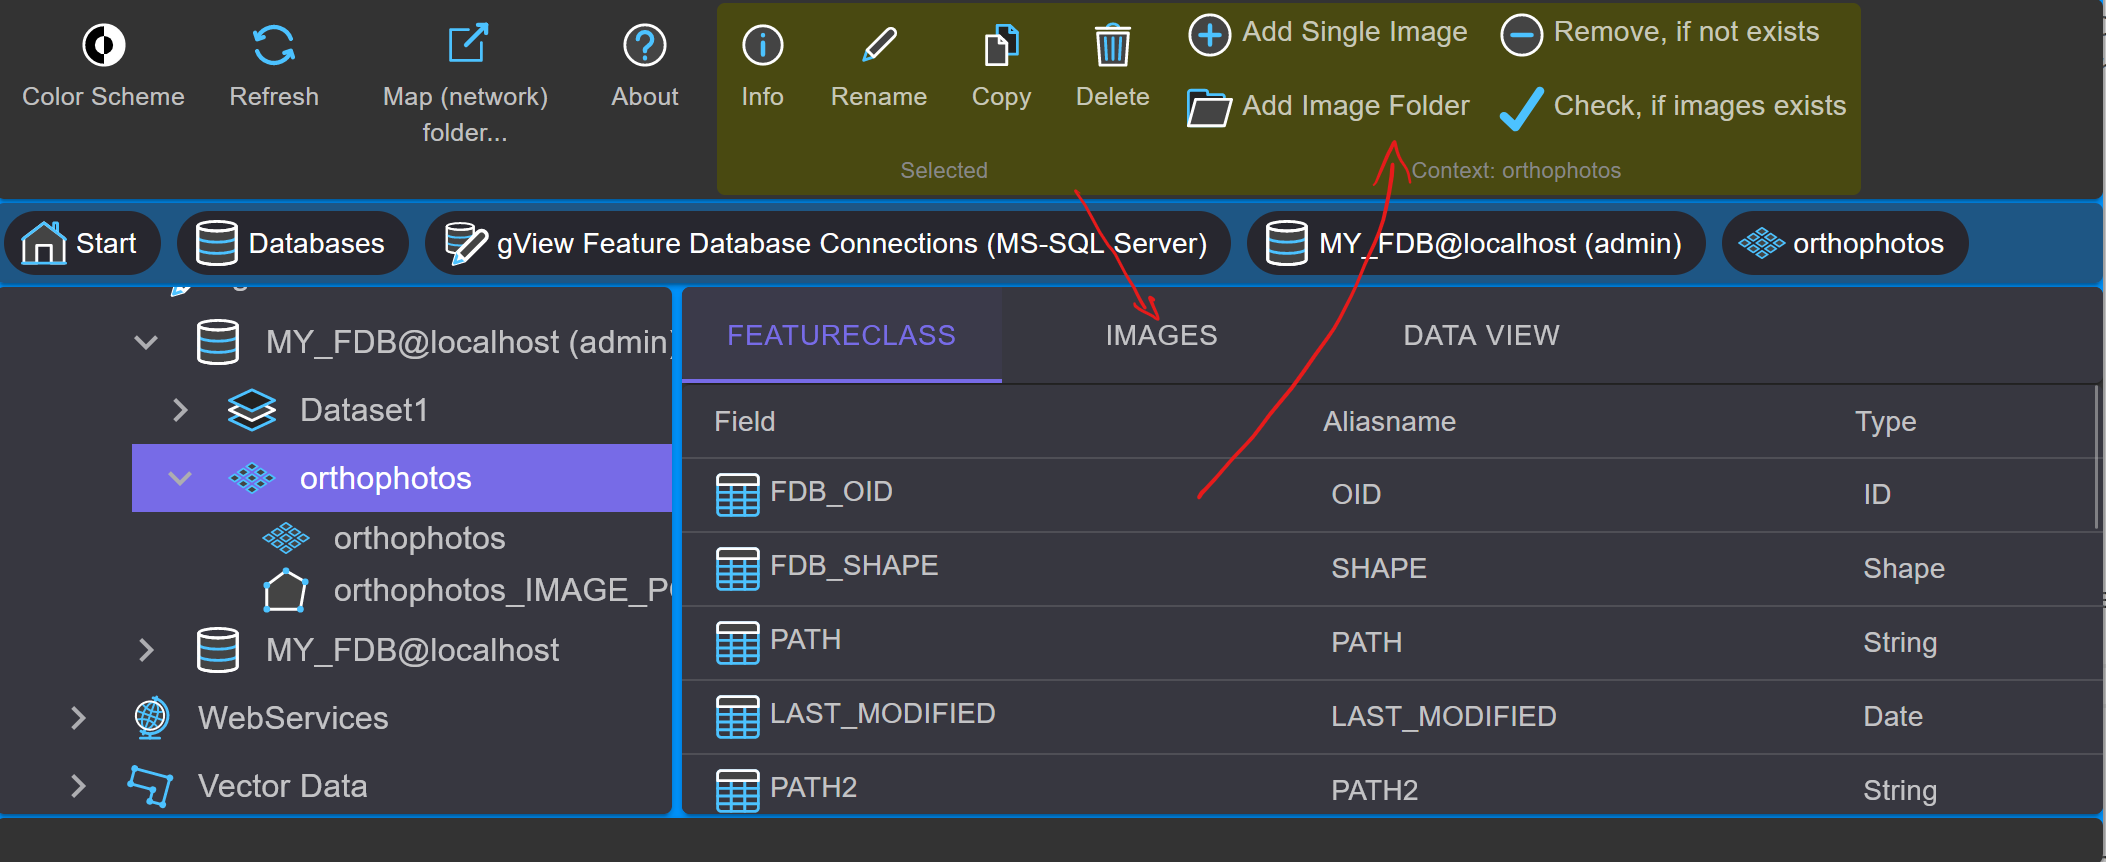
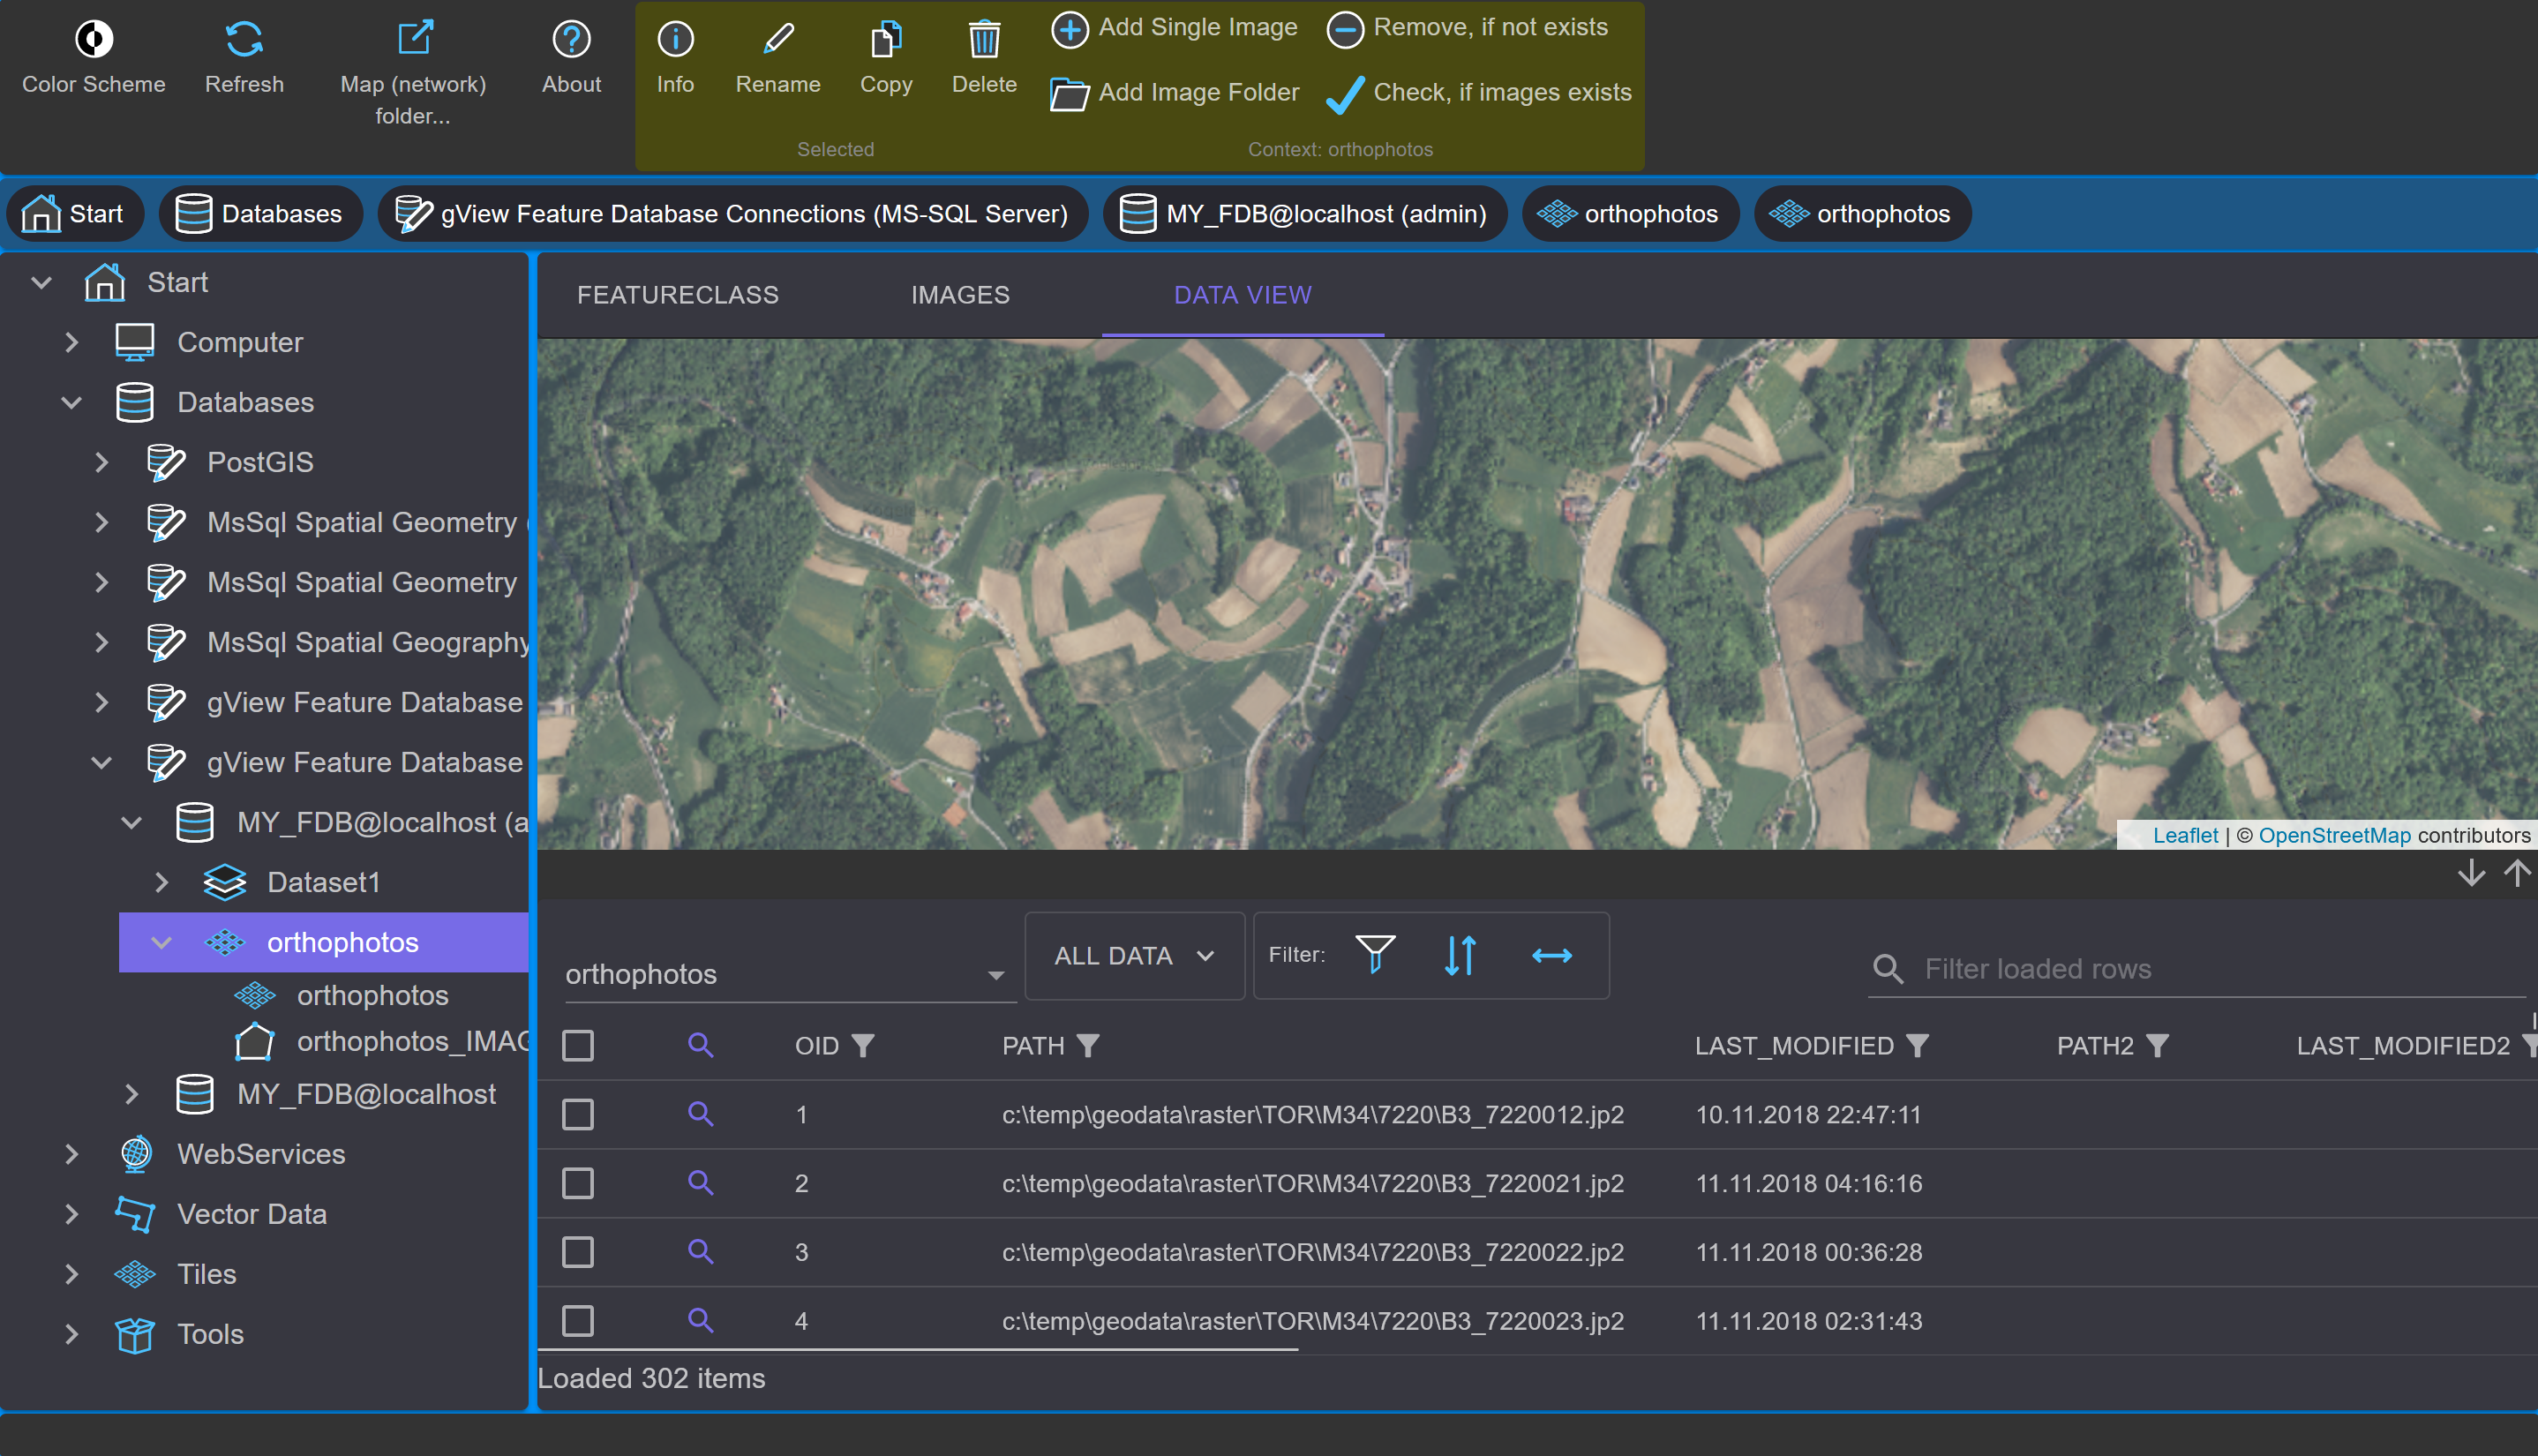
In the Images tab, the paths to the image files contained in the raster catalog dataset
are displayed. The list is naturally empty after creation. To add data, you have two tools available:
Add single image: Opens a dialog for opening files, where multiple selections are also possible.
Add image folder: Searches a directory and its subdirectories for images. In a dialog, you select a root directory and a filter:
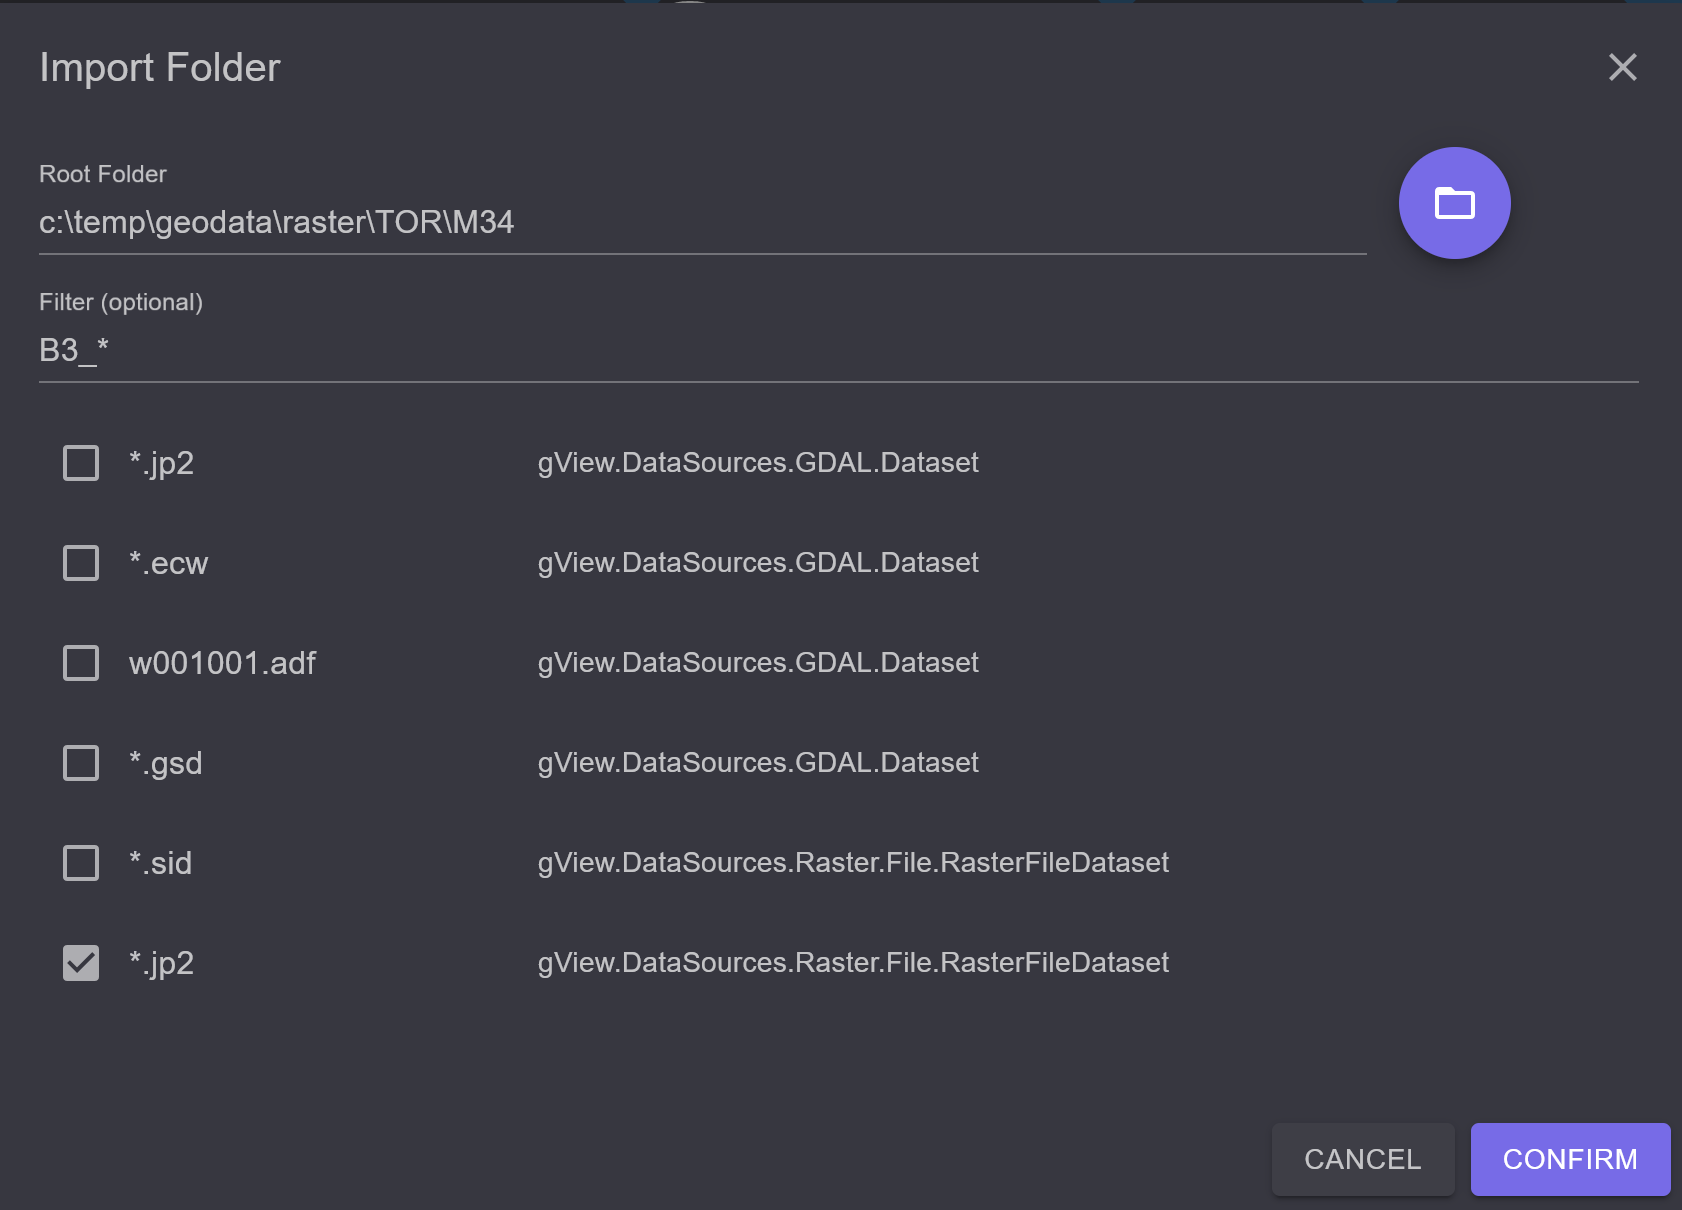
After confirming the dialog with OK, a script window appears again to start the import.
If the import is successfully completed, the images appear as a list in the Images tab:
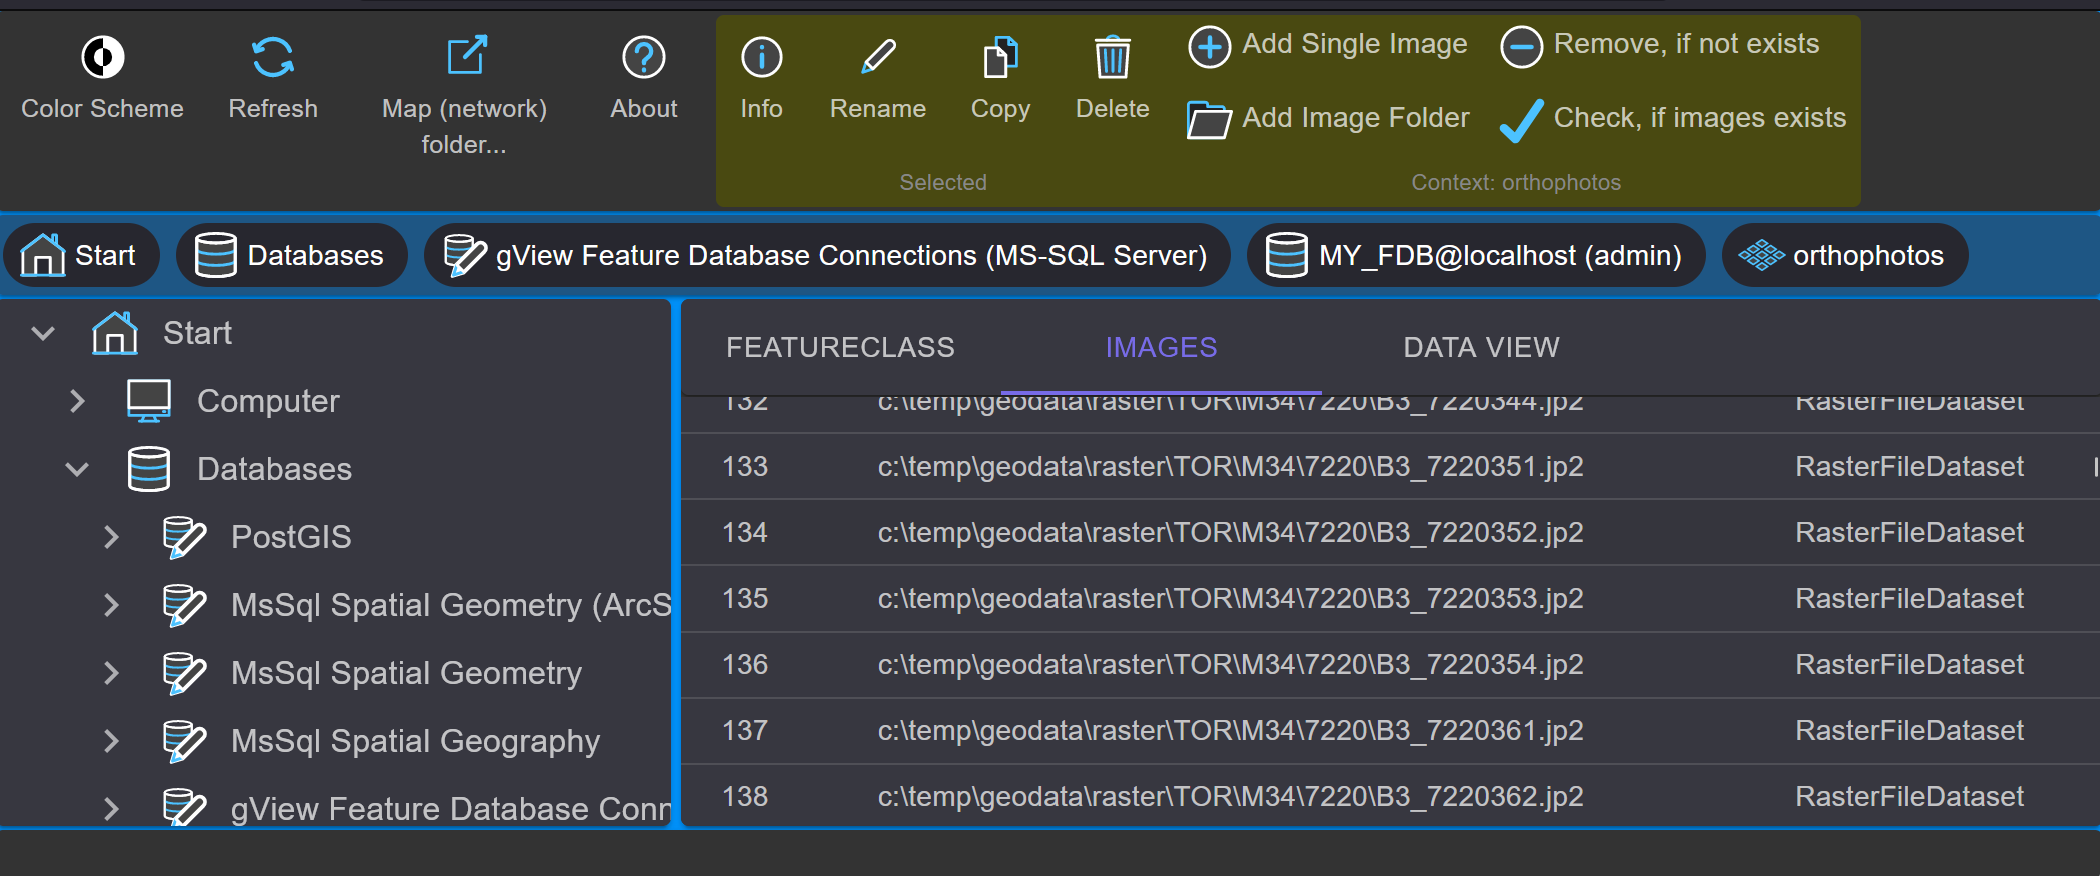
In the Data View tab, you can view the imported images: