API Client
An API Client is an application that needs to access a Web API requiring a valid Bearer Token issued by IdentityServerNET.
API Resource
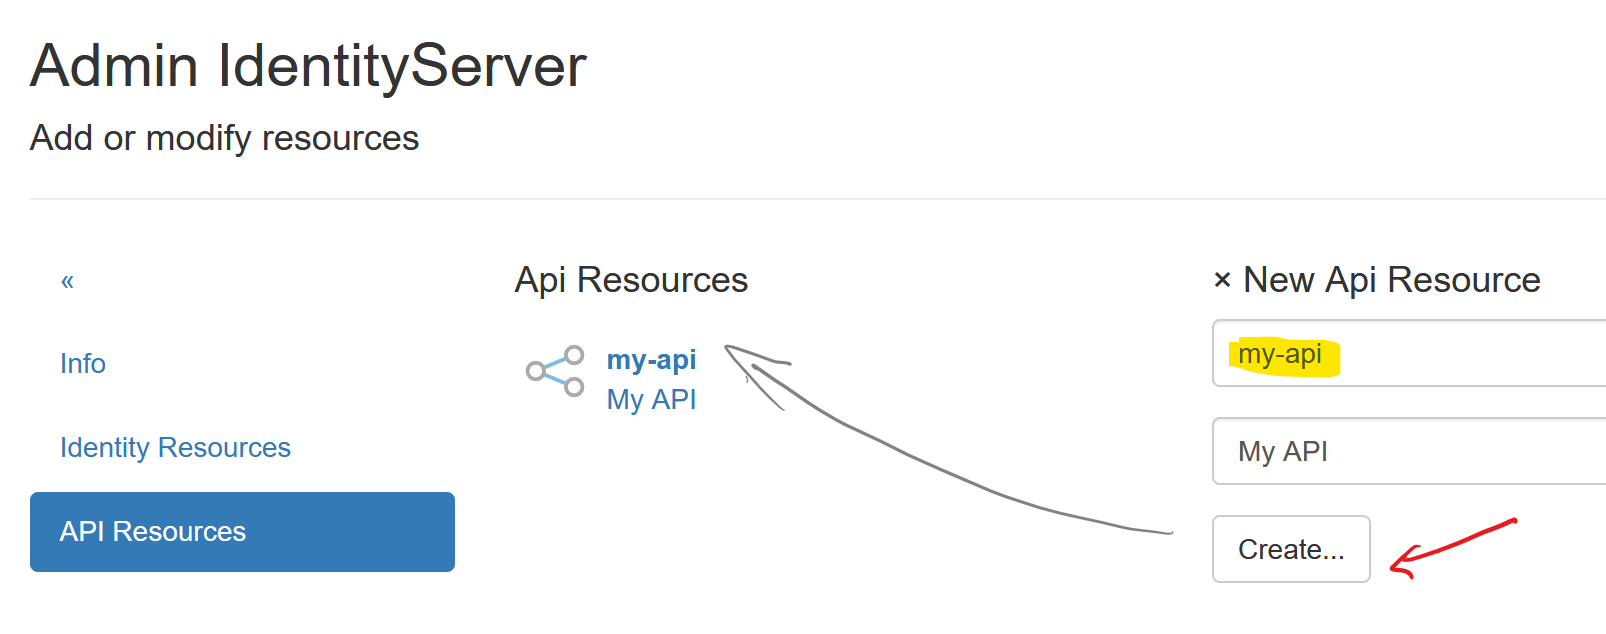
To issue a Bearer Token for an API, this API must first be created as an
API Resource. Navigate to Resources (Identity & APIs)/API Resources
via the Admin page to add a new API Resource:
In the next step, Scopes must be created for the API Resource:
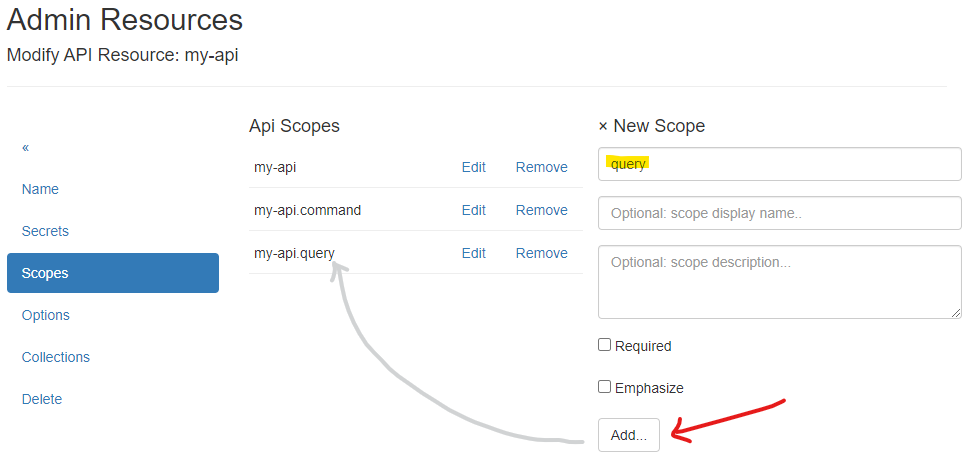
Note
The naming convention for API Resource scopes is: api-resource-name.scope-name.
When a scope is entered, it is automatically converted to this format. An exception is a scope
that has the same name as the api-resource. To create a scope that does not follow this
convention, prefix it with @@, e.g., @@scope-name.
For an API, the following scopes are created automatically:
{api-name}: General access to the API{api-name}.query: Read-only access to data provided by the API{api-name}.command: Additionally, write access to data provided by the API
Note
The {api-name} scope should later be added to a client as a scope. This scope
will then correspond to the Audience (aud) of the token!
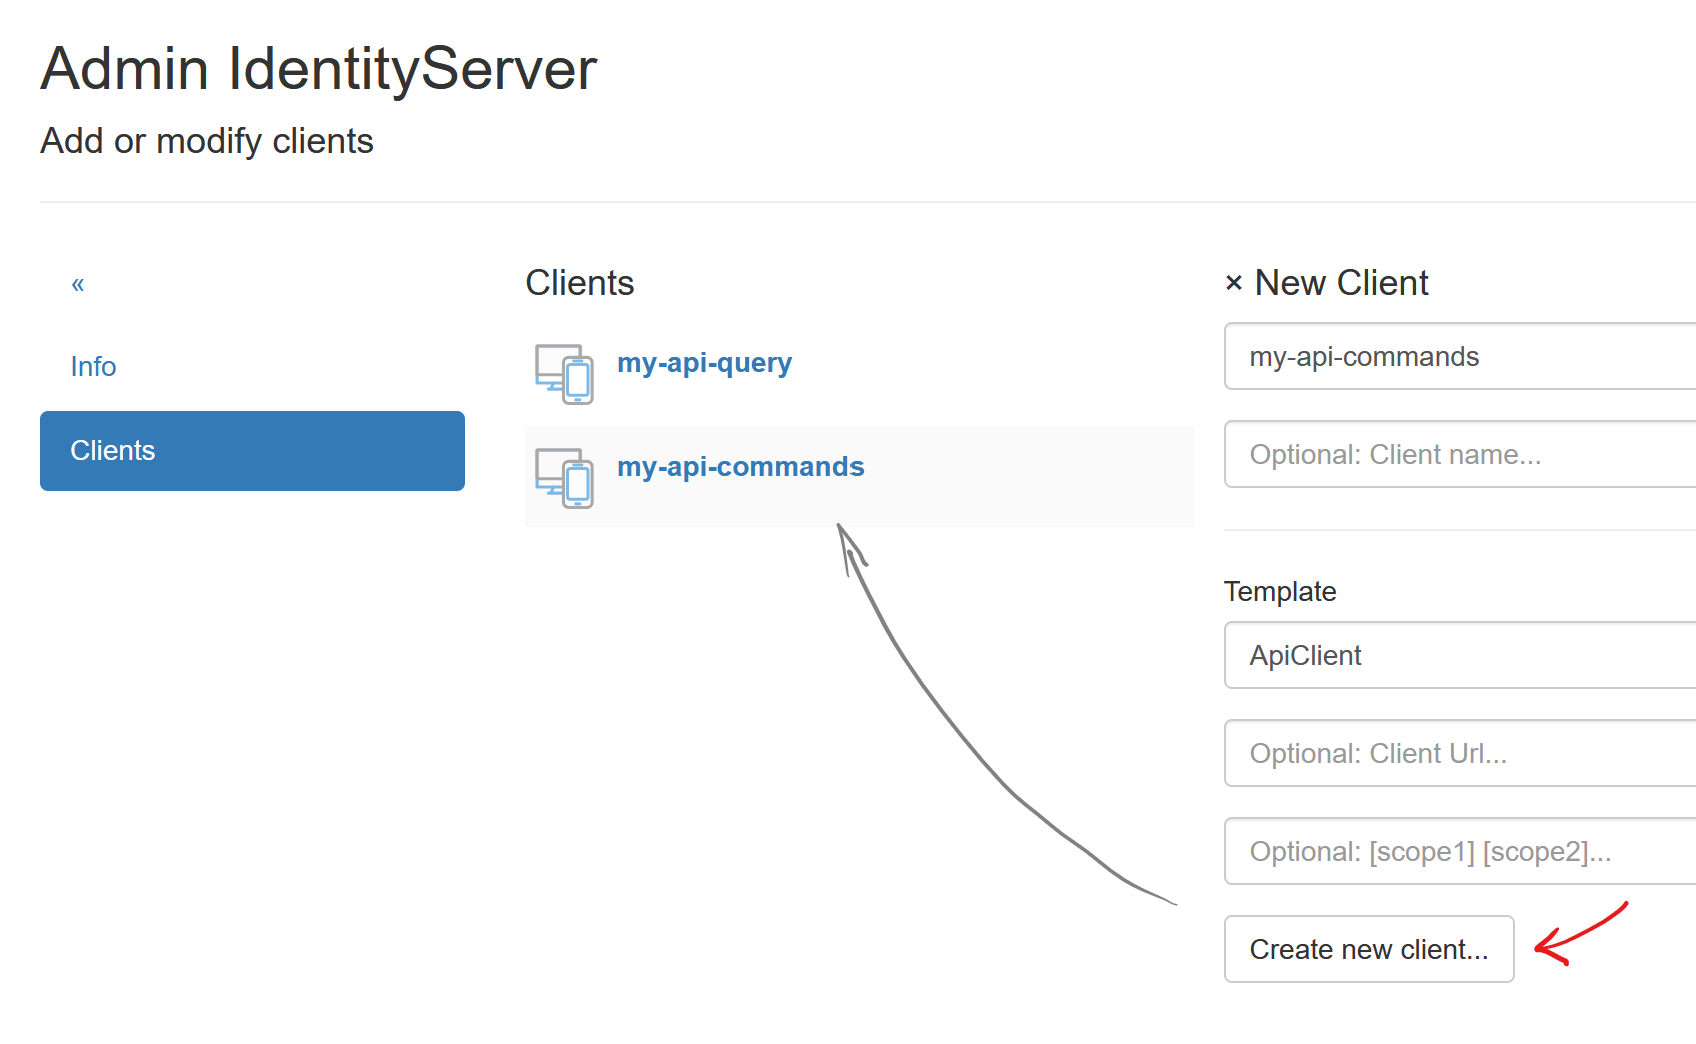
Creating/Editing an API Client
To create a new Client, a unique Client Id must be assigned. An optional display name can also be provided.
To simplify input, select the API template. Additionally, in this template,
enter the URL of the web application. Entering Scopes is optional and can
also be edited in the next step:
After successfully creating the client, you will be redirected to the Modify Client: ... page.
The various client properties are organized into menu items:
Name:

Here, you can change the client’s display name and add a description.
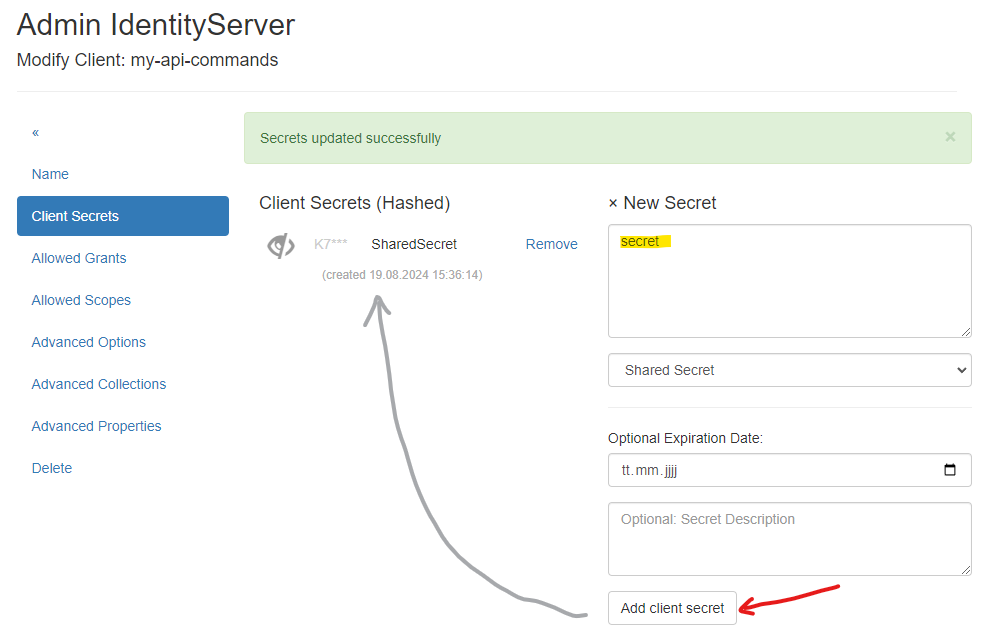
Client Secrets
Here, a secret must be provided that the client uses to authenticate with the Identity Server.
A secure secret can be generated via the Random Secret Generator. For simplicity, we will use
the secret secret:
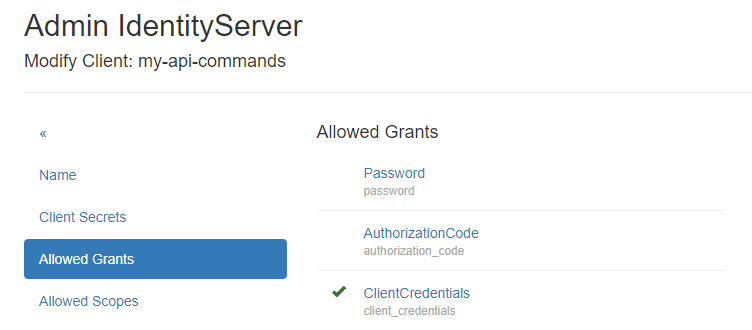
Allowed Grants
Since the client type ApiClient was selected when creating the client, ClientCredentials should be selected here:
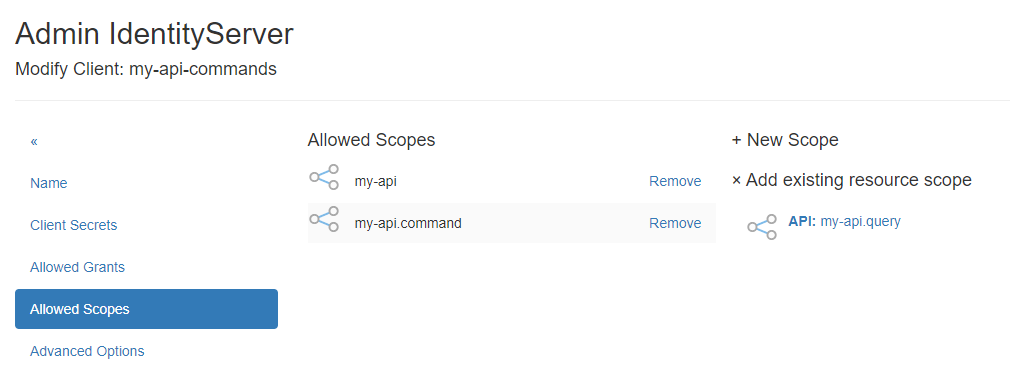
Allowed Scopes
Here, the scopes created for the API Resource must be added. The Scopes specify specific
access rights to the API. For the my-api-command client, it makes sense to select the my-api
and my-api.command scopes from the Add existing resource scope section:
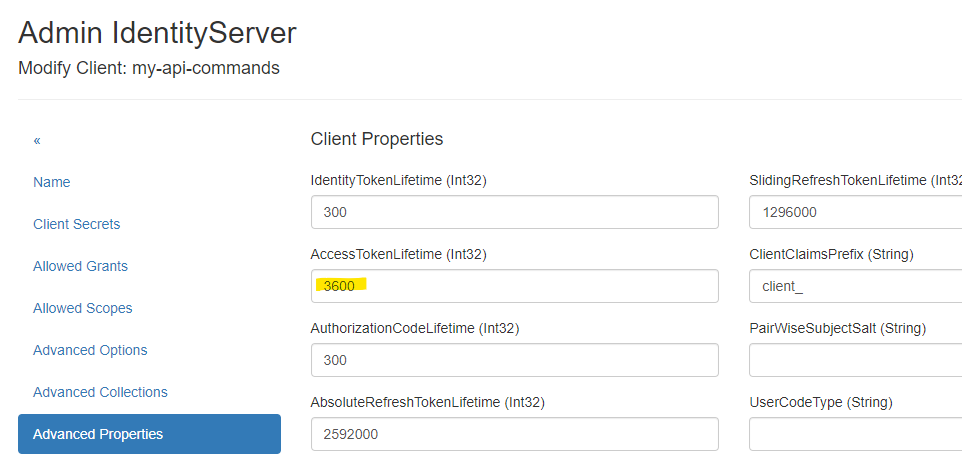
Advanced Properties
Here, the lifetime of an AccessToken can be defined, for example:
Note
All other menu items are less relevant for API Clients and are not listed in detail here.
Retrieving an AccessToken
HTTP Request
A client application can retrieve an AccessToken from IdentityServerNET using an HTTP POST request
with the necessary parameters in the body. The scopes are passed via the scope parameter, using spaces as separators:
POST https://localhost:44300/connect/token
Content-Type: application/x-www-form-urlencoded

grant_type=client_credentials&client_id=my-api-commands&client_secret=secret&scope=my-api my-api.command
or
POST https://localhost:44300/connect/token
Authorization: Basic bXktYXBpLWNvbW1hbmRzOnNlY3JldA==
Content-Type: application/x-www-form-urlencoded

grant_type=client_credentials&scope=my-api.command my-api
{
    "access_token": "eyJhbGciOiJSUzI1NiIsImtpZCI6IkVCM...",
    "expires_in": 3600,
    "token_type": "Bearer",
    "scope": "my-api my-api.command"
}
Note
The scope parameter can also be omitted. In this case, the token will include all scopes configured for the client.
IdentityServerNET.Clients
To retrieve a token, the NuGet package IdentityServerNET.Clients can also be used:
dotnet add package IdentityServerNET.Clients
var tokenClient = new IdentityServerNET.Clients.TokenClient("my-api-commands", "secret");
await tokenClient.GetAccessToken("https://localhost:44300", []);

var accessToken = tokenClient.AccessToken;
IdentityModel
IdentityModel also provides a way to retrieve a token:
dotnet add package IdentityModel
var client = new HttpClient();

// Entdecke den Endpunkt des IdentityServers
var discovery = await client.GetDiscoveryDocumentAsync("https://localhost:44300");
if (discovery.IsError)
{
    Console.WriteLine(discovery.Error);
    return;
}

// Get tht Token
var tokenResponse = await client.RequestClientCredentialsTokenAsync(new ClientCredentialsTokenRequest
{
    Address = discovery.TokenEndpoint,

    ClientId = "my-api-commands",
    ClientSecret = "secret",
    Scope = "my-api my-api.command"
});

if (tokenResponse.IsError)
{
    Console.WriteLine(tokenResponse.Error);
    return;
}

Console.WriteLine(tokenResponse.AccessToken);