Web Application
Creating/Editing a Client
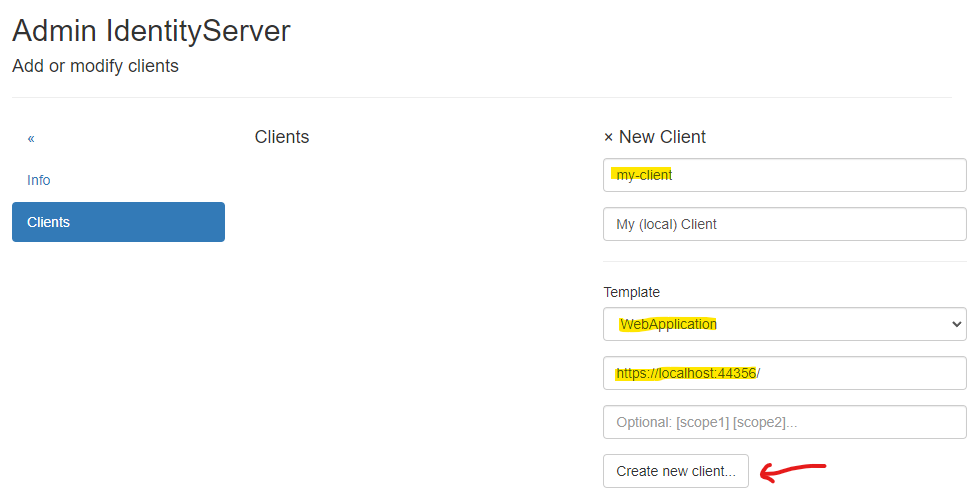
To create a new client, a unique Client Id must be assigned. An optional display name can also be provided.
To simplify input, the WebApplication template should be selected.
Additionally, the URL to the web application should be entered for this template. Specifying scopes is optional and
can also be done in the next step.
Use Create new client... to create the new client:
After successfully creating the client, you will be taken to the Modify Client: ... page.
The various client properties are organized into menu items:
Name:
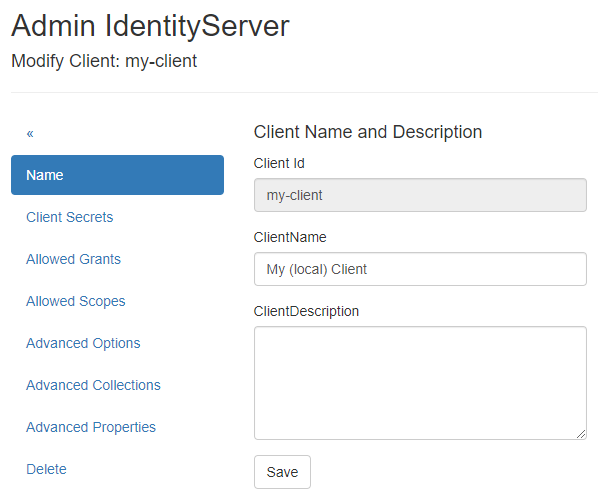
Here, you can change the client’s display name and add a description.
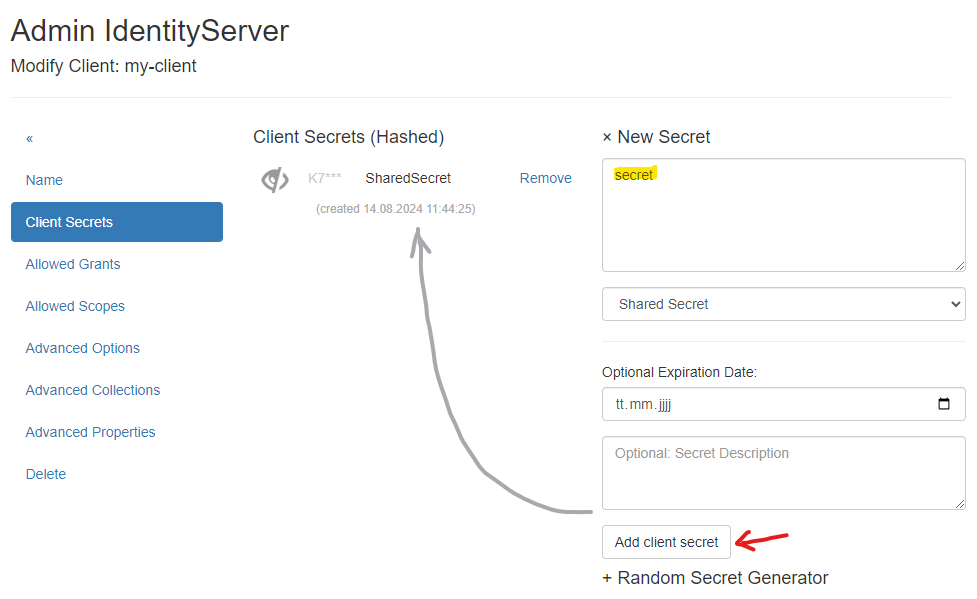
Client Secrets:
A client should also have a secret. The client application must send this secret when logging in. A secret can be either a text-based Shared Secret or a certificate (X509 Certificate *.crt). A shared secret can also be stored in the Secrets Vault (see later).
The shared secret can be any text, like a password. If you want a secure secret, you can use the Random Secret Generator on this page.
Note
A secret can also have an expiration date (Optional Expiration Date) and a description.
The secret should be secure. For simplicity in this example, we will use the value secret without an expiration date:
Note
Multiple secrets can be created. The client must then pass exactly one valid secret. This is useful if a secret needs to be rotated. The new secret can coexist with the old secret until all clients switch to the new secret. Only then should the old secret be deleted.
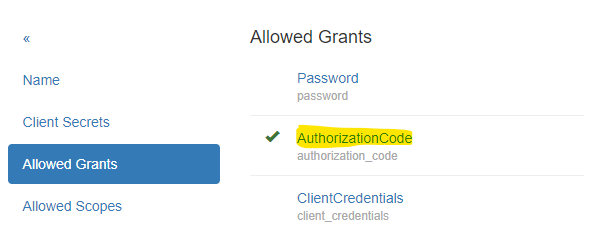
Allowed Grants:
This section allows you to set the grants permitted for login. Each login method uses different grants. Since the WebApplication
template was selected when creating the client, the appropriate grants should already be set here:
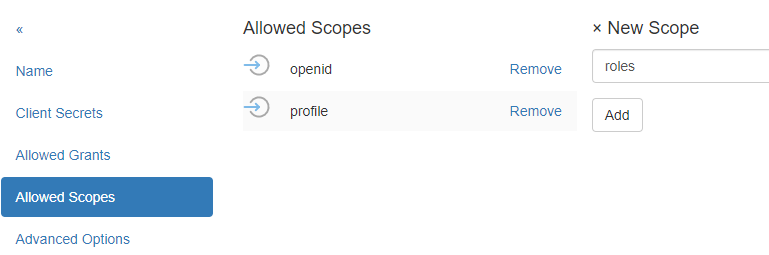
Allowed Scopes:
Scopes specify which identity resources the web application can request for a logged-in user. Only scopes configured as identity resources in IdentityServerNET should be listed here (see section Getting Started).
For web applications, openid and profile are entered by default:
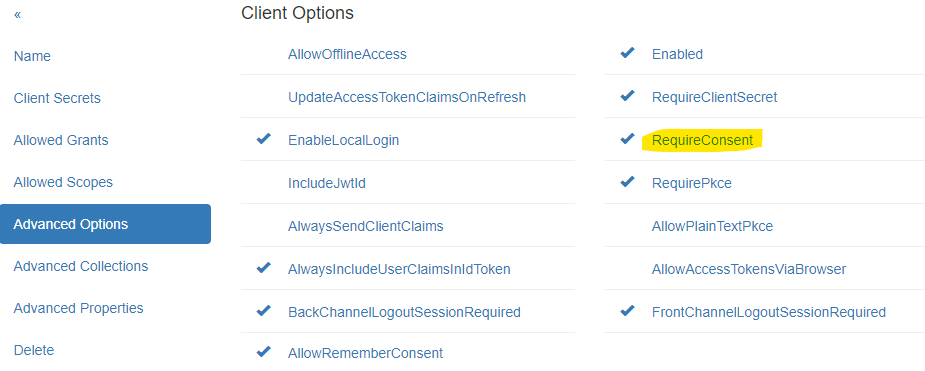
Advanced Settings:
Here, you can specify additional options for authentication. For example, you can specify whether a secret must always be provided by the client
(RequireClientSecret).
The RequireConsent option controls whether a user must consent after logging in to allow the web application access to the requested scopes (claims):
Advanced Collections:
Here, collections necessary for login can be specified. For web applications, it is essential to specify the URL to which a user is redirected after a successful login (RedirectUri).
To specify multiple URLs, enter each URL on a new line:
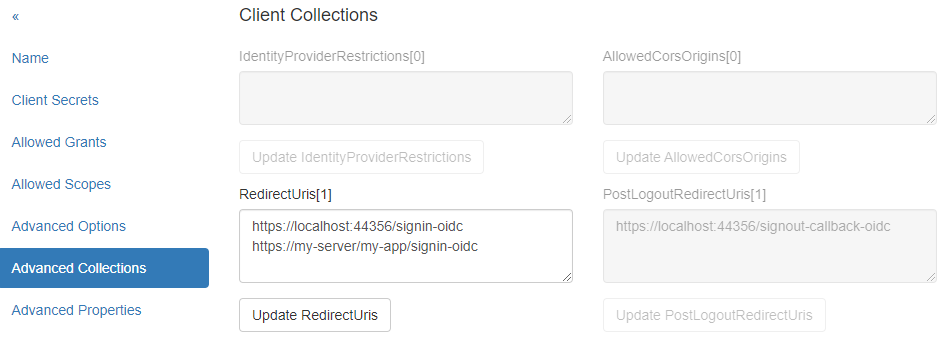
If a login request later comes from a page not listed here, IdentityServerNET will reject it.
Advanced Properties:
Advanced settings for the client, such as IdentityTokenLifetime and AccessTokenLifetime. These values generally do not need to be changed.
Delete:
Here, you can delete a client.
Adjusting a Client Web Application
A client must support OpenId Connect. In the ASP.NET Core environment, the necessary methods are available.
IdentityServerNET provides a straightforward approach via extension methods for the IServiceCollection object. The following NuGet package must be installed:
dotnet add package IdentityServerNET.Extensions.DependencyInjection
This package adds the following method to IServiceCollection:
using IdentityServerNET.Extensions.DependencyInjection;

var builder = WebApplication.CreateBuilder(args);

// ...

builder.Services.OpenIdConnectAuthentication(builder.Configuration);
The method retrieves parameters from the app configuration (e.g., appsettings.json). The configuration must contain a
section OpenIdConnectAuthentication with the required parameters.
Note
The section name can also be changed. In that case, the appropriate section should be passed instead of OpenIdConnectAuthentication.
{
    // ...
    "OpenIdConnectAuthentication": {
        "Authority": "https://localhost:44300",
        "ClientId": "my-client",
        "ClientSecret": "secret",
        "Scopes": "openid,profile"
    }
}