The editor
You build a workflow in the editor: nodes on a canvas, connected by lines. Open it from the workflow list, or create a new workflow there.
Layout
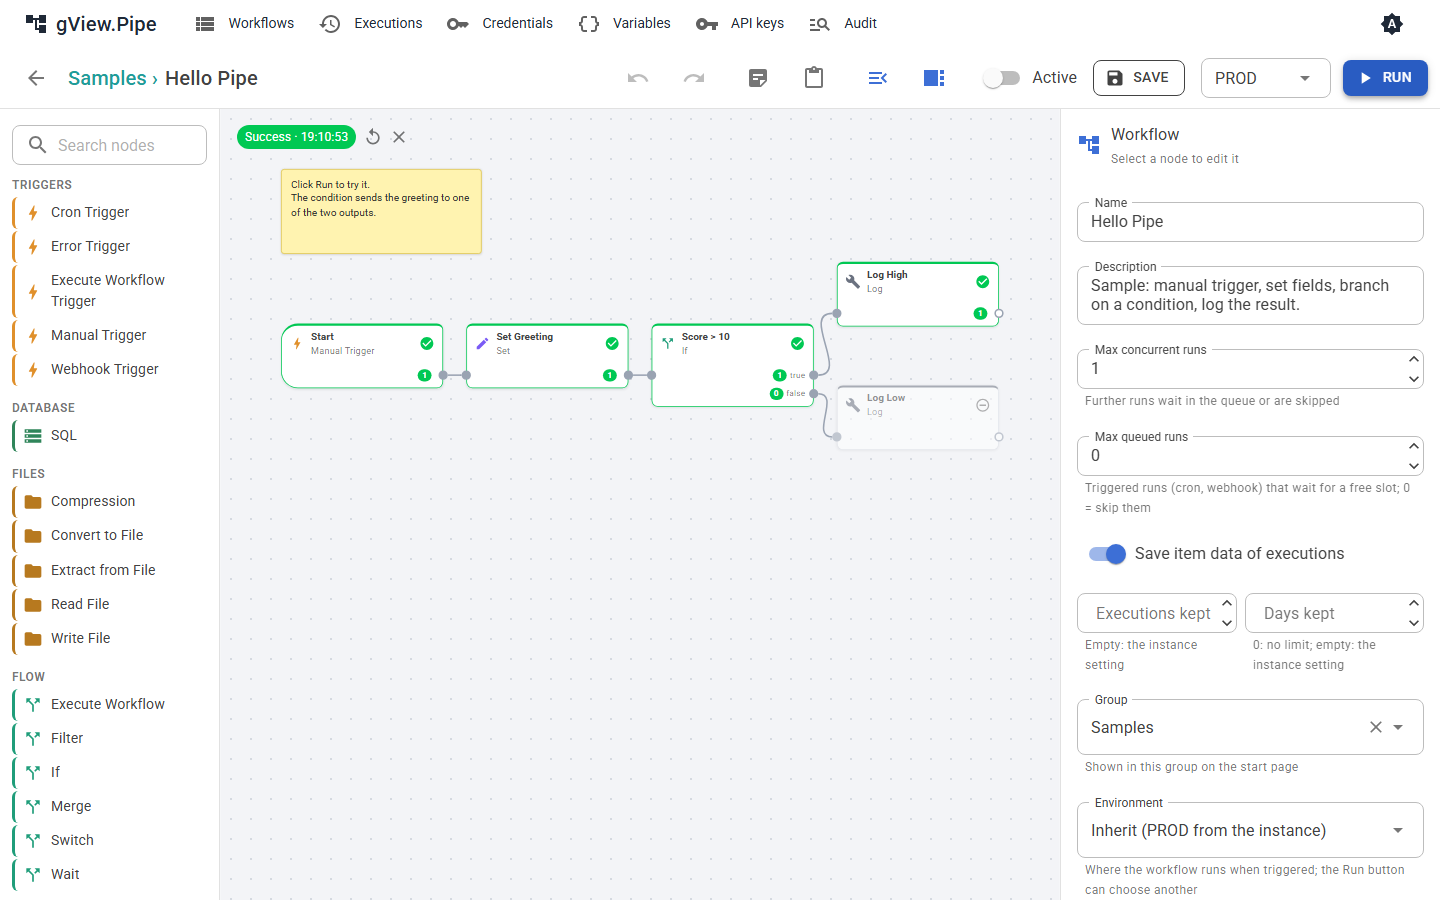
| Area | Purpose |
|---|---|
| Palette (left) | All node types by category, with a search field. Hover a node for its description. |
| Canvas (middle) | The workflow. Nodes show their name and type; ports are the dots on their edges. |
| Side panel (right) | With no node selected: the settings of the workflow. With a node selected: its parameters, settings and run result. |
| Toolbar (top) | Back, undo and redo, paste, add a note, show or hide the palette and the side panel, the Active switch, Save and Run. |
The palette and the side panel can be resized by dragging the thin bar next to them. A double click resets the width. Two toolbar buttons hide and show them, to give the canvas more room; the browser keeps that choice. A large workflow is shown at 70 % at least, so the names stay readable; scroll the canvas to see the rest.
The icon at the right of the top bar switches the colors: following the system, light or dark. The browser keeps your choice.
Building a workflow
- Add a node: click it in the palette. It appears on the canvas; drag it where you want it.
- Connect nodes: drag from an output port (right edge) to an input port (left edge) of another node. Items flow along the line. A node with several outputs (If, Switch) has one port per output.
- Edit a node: click it. The side panel shows its Parameters, Settings and Run tabs.
- Delete: select a node or a line and press Delete, or use the trash icon in the side panel.
- Save: the Save button or Ctrl+S stores the workflow. If you leave the editor or close the tab with unsaved changes, it asks first. Triggers of an active workflow (Cron, Webhook) are armed when you save.
Tip
Hold Shift while you drag a node onto an existing line to insert it there. The line lights up before you drop.
The first node of a workflow is a trigger (see Triggers and webhooks). A workflow can have several triggers; a manual run starts at every node that has no incoming connection.
Copy, paste and undo
- Copy a selection with Ctrl+C on the canvas, paste with Ctrl+V. Pasting also works into another workflow, so you can move parts between workflows. The toolbar has a paste button too.
- Duplicate a node with the icon in the side panel.
- Undo and redo (Ctrl+Z, Ctrl+Y or Ctrl+Shift+Z on the canvas, or the toolbar) work for every change to the workflow. Typing into the fields of one node counts as one step.
Notes
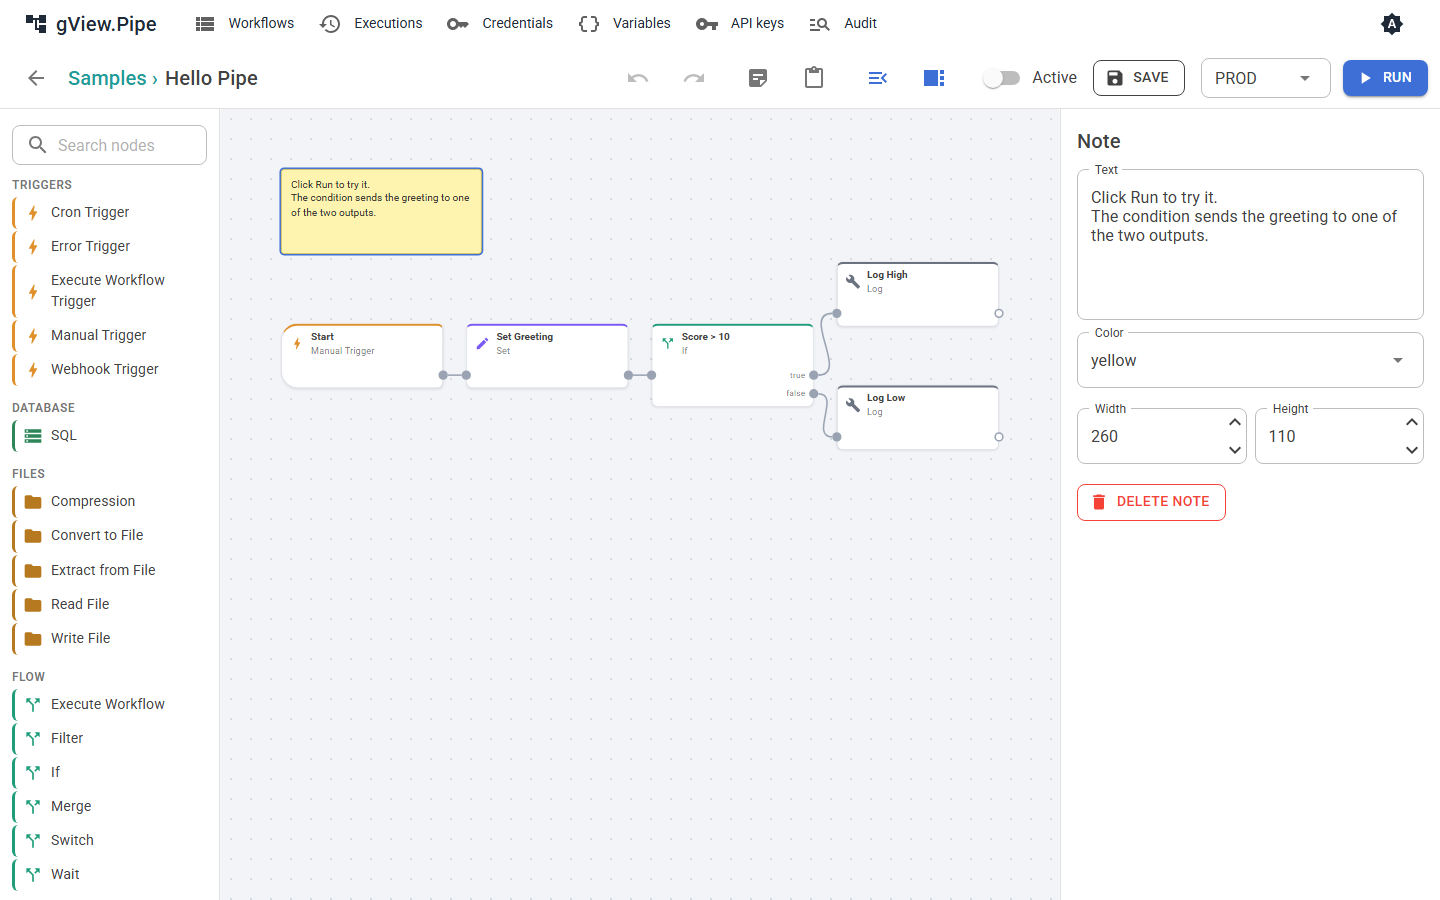
Use the note button in the toolbar to put a sticky note on the canvas, for example to explain why a filter is there or what to set up first. Select a note to change its text, color (yellow, green, blue, red, purple, gray) and size in the side panel; drag it like a node. Notes lie behind the nodes, have no ports and don't affect a run. They can be copied, pasted, duplicated, deleted and undone like nodes. Without the editor role you see them read only.
Node tabs
Parameters
The form is generated from the node. Most text fields accept expressions: {{ $json.total * 1.2 }} is evaluated for each item (see Items and expressions). In the Run tab you can click a field of the input to insert it as an expression into the parameter you edited last.
Changes take effect while you type; you don't have to leave a field before you select another node or save.
Expressions are tinted in their field. After a run, a line below the field shows its value for the first input item of the node, for example = Hello Hello Pipe!. $node["Name"] can't be resolved there and shows a warning; the run itself is not affected.
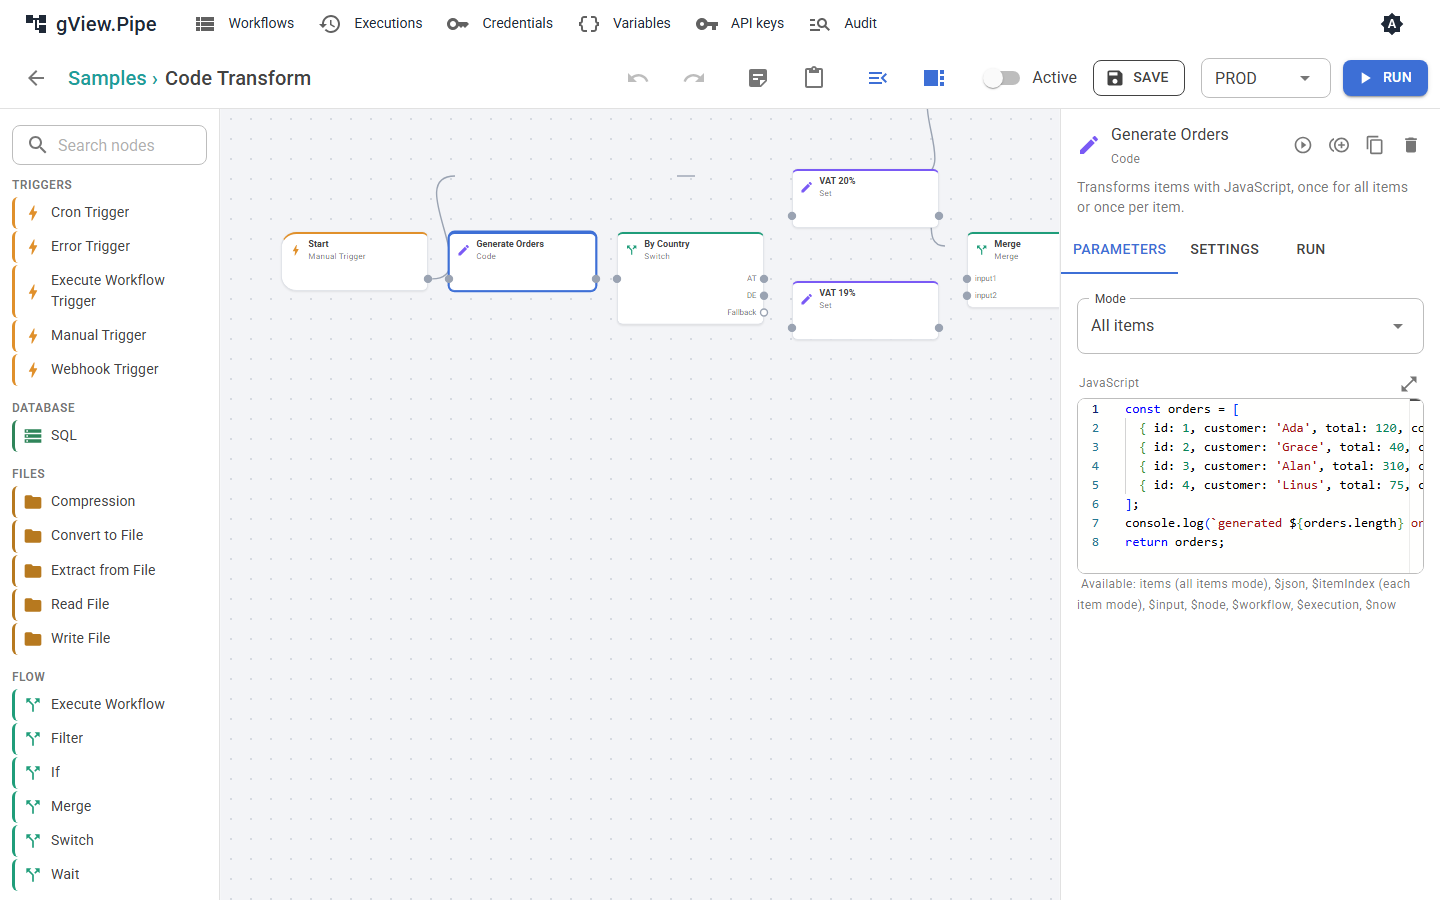
Code fields (the JavaScript of the Code node, the SQL of the SQL node, raw JSON) open in a code editor with syntax highlighting, line numbers and the usual editor keys (Tab to indent, Ctrl+F to find, Alt+Up/Down to move lines). The field grows with its content; the icon above it opens a large editor, and Apply takes its text over.
Some nodes show hints above their parameters, for example the URL of a webhook or a warning that it has no credential.
Settings
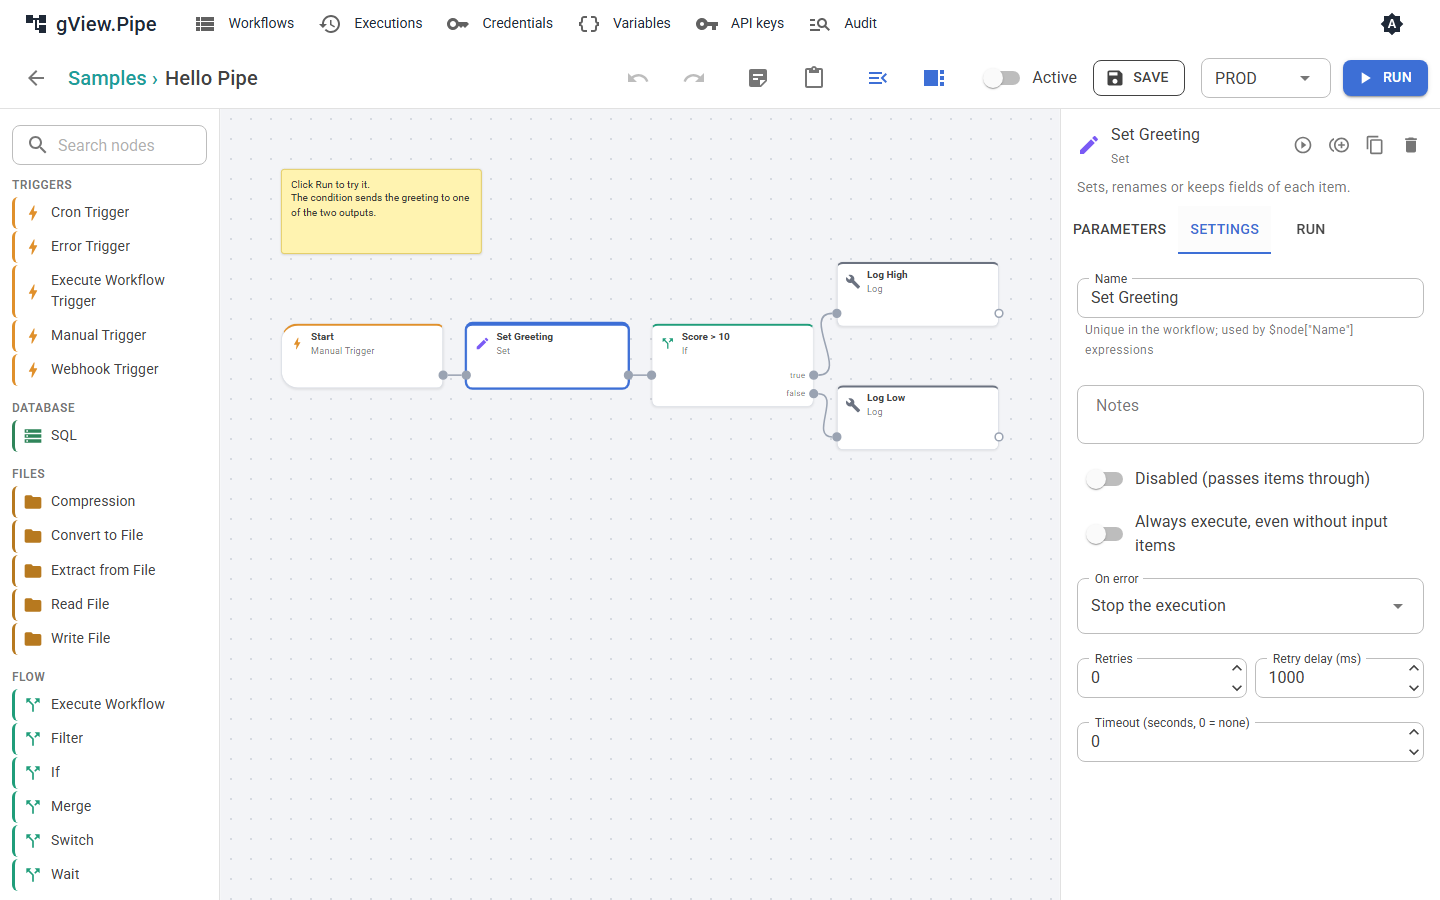
| Setting | Meaning |
|---|---|
| Name | Unique in the workflow. Expressions use it: $node["Name"]. |
| Notes | Free text for yourself. |
| Disabled | The node passes its items through without running. |
| Always execute | Run the node even when it received no items. |
| On error, Retries, Timeout | See Error handling. |
Run
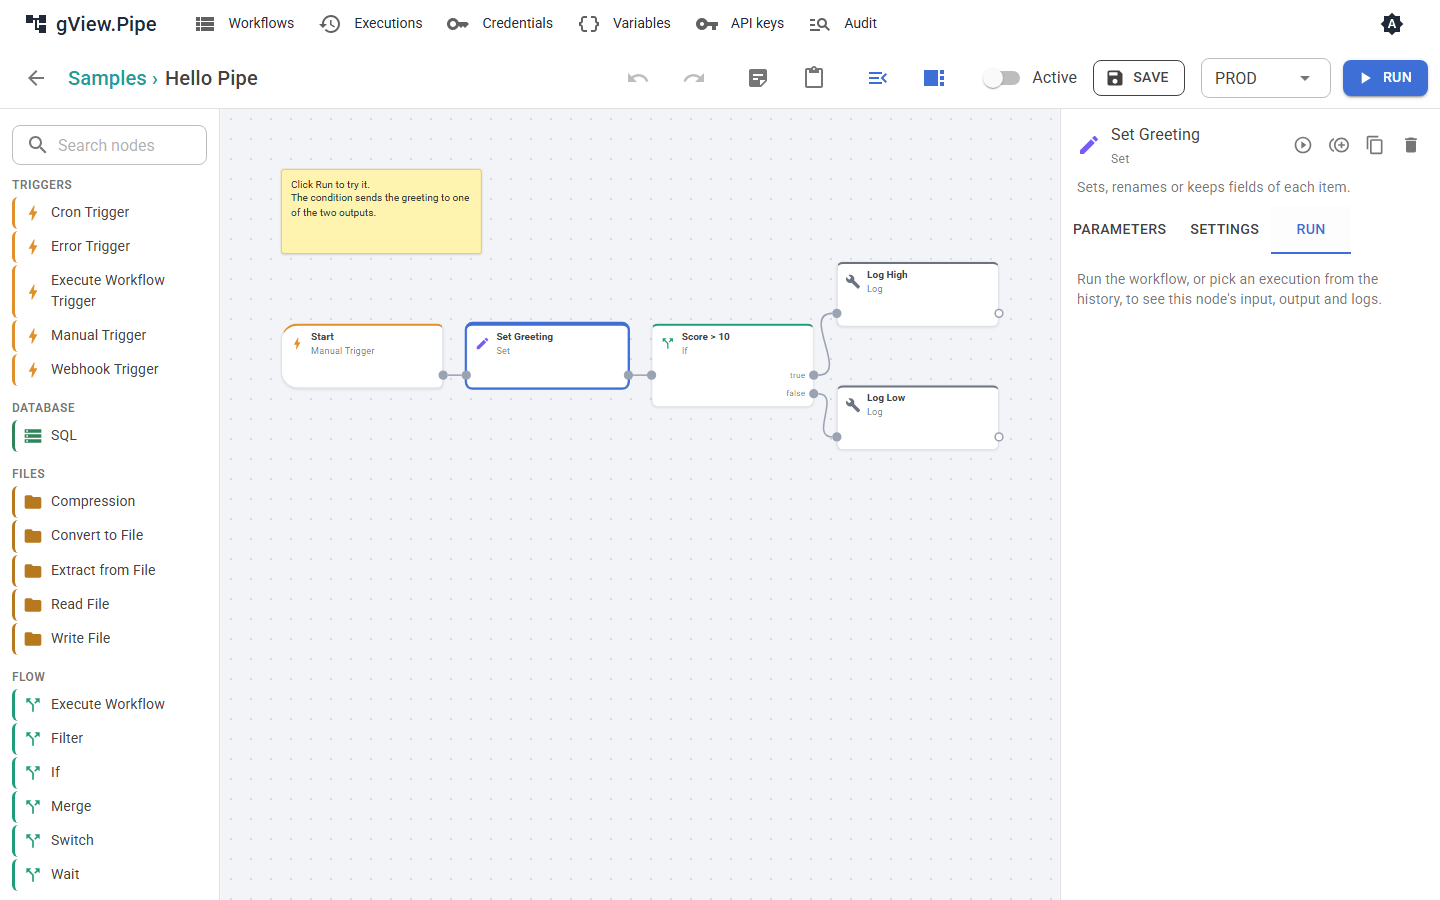
After a run, this tab shows the Input the node received, the Output it produced per port and its Logs. Items can be shown as JSON or as text. A node that wrote output while it was running (for example a script) shows it live.
Running and testing
- Run starts the workflow from the editor, in the environment chosen next to the button (see Variables and environments). Nodes show their state: green for success, red for an error, gray when they got no items and were skipped. A badge on each output shows how many items it produced.
- Run to here (play icon in the side panel) runs only the selected node and the nodes it depends on.
- Pin output (in the Run tab) keeps a node's output. Manual runs then use the pinned items instead of running the node again, which is useful for nodes that call a slow or costly API. Pinned nodes show a pin. Runs started by a trigger ignore pinned data, so production runs never use test data.
- Closing the green or red result chip above the canvas clears the display of the last run.
Groups
Workflows are sorted into groups, shown as tiles on the start page. A workflow is in at most one group. Change it with the Group field of the workflow panel, Move to group in the list, or by dragging a row onto a tile.
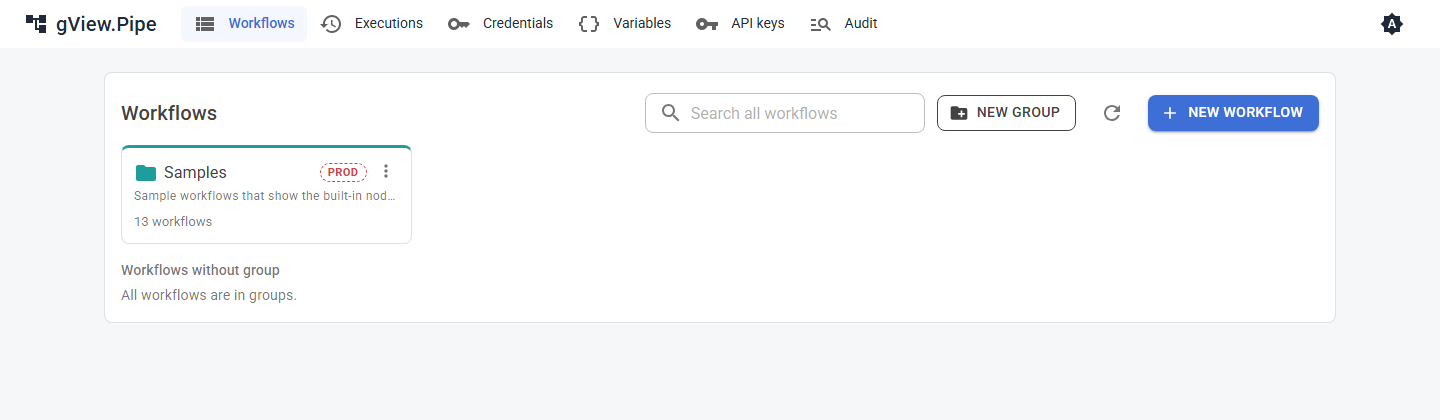
Open a group to see its workflows and to create new ones in it. Deleting a group never deletes its workflows. The group dialog (pencil on the tile) sets name, color, the portal roles and what its workflows inherit: the environment, variables and the error workflow.
Workflow settings
Select no node (click the empty canvas) to see the settings of the workflow:
| Setting | Meaning |
|---|---|
| Name, Description | Shown in the list. |
| Max concurrent runs | How many runs of this workflow may be active at the same time (default 1). More wait in the queue or are skipped; a webhook caller gets 429 then. |
| Max queued runs | How many triggered runs (cron, webhook, error workflow) may wait for a free slot, in the order they arrived (default 0: skip them). Waiting runs show as Queued under "Running now" and can be stopped there. Manual runs are never queued. |
| Save item data of executions | Switch off to store only statuses, counts and logs in the history (sensitive data). |
| Group | The group on the start page. |
| Environment | The environment of triggered runs, or Inherit from the group or the instance. See Variables and environments. |
| Webhook callers may choose | Environments a webhook caller can pick with X-Pipe-Environment. |
| Variables | Variables of this workflow, one value per environment. |
| Error workflow | Started when a triggered run fails, see Error handling. Inherit (the default) takes the group's or the instance's, None switches it off. |
| Publish in portal | Makes the workflow visible to users in the user portal, in the category of its group. Then you choose who may see it (Only these roles), whether users wait or the run goes to the background, the wait timeout, whether users may switch, whether they may stop the run and whether only one run may go at a time. The form comes from a Form Trigger node, the result from a Result node. Without a Form Trigger the workflow starts without input. See REST API. |
| Executions | The history of this workflow, see Executions. |